This guide walks you through the steps to enable Cybersource Unified Checkout in your Business Center account. Before proceeding, ensure that your Merchant ID (MID) is configured to use Unified Checkout and that all desired payment methods are properly set up.
Step 1: Log in to the Business Center
Use the appropriate environment link to access your Business Center:
- Test URL: https://businesscentertest.cybersource.com/ebc2
- Production URL: https://businesscenter.cybersource.com
💡 Tip: If you cannot access the page, contact your Cybersource sales representative.
Step 2: Access Unified Checkout Settings
Once logged in, navigate using the left-hand menu:
Payment Configuration → Unified Checkout
This section allows you to configure and manage payment methods available through Unified Checkout.
Step 3: Configure Digital Payment Methods
You can enable and manage supported digital wallets such as:
- Apple Pay
- Click to Pay
- Google Pay
Click Set up for each desired payment method and follow the on-screen setup instructions.
Once enabled, these methods will appear under the Payment Configuration section.
⚠️ Important:
You must configure each payment method you intend to use for every transacting MID.
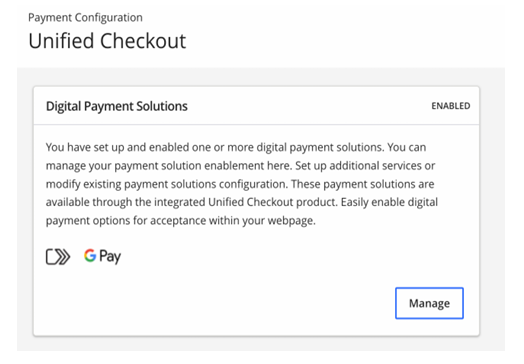
Step 4: Manage or Update Payment Methods
To modify existing configurations or add new payment solutions as they become available:
- Go to the Unified Checkout section.
- Click Manage next to the payment solution you wish to edit.
This allows you to:
- Adjust current payment method settings.
- Add new digital payment solutions.
- Maintain up-to-date configurations as Cybersource releases new payment options.