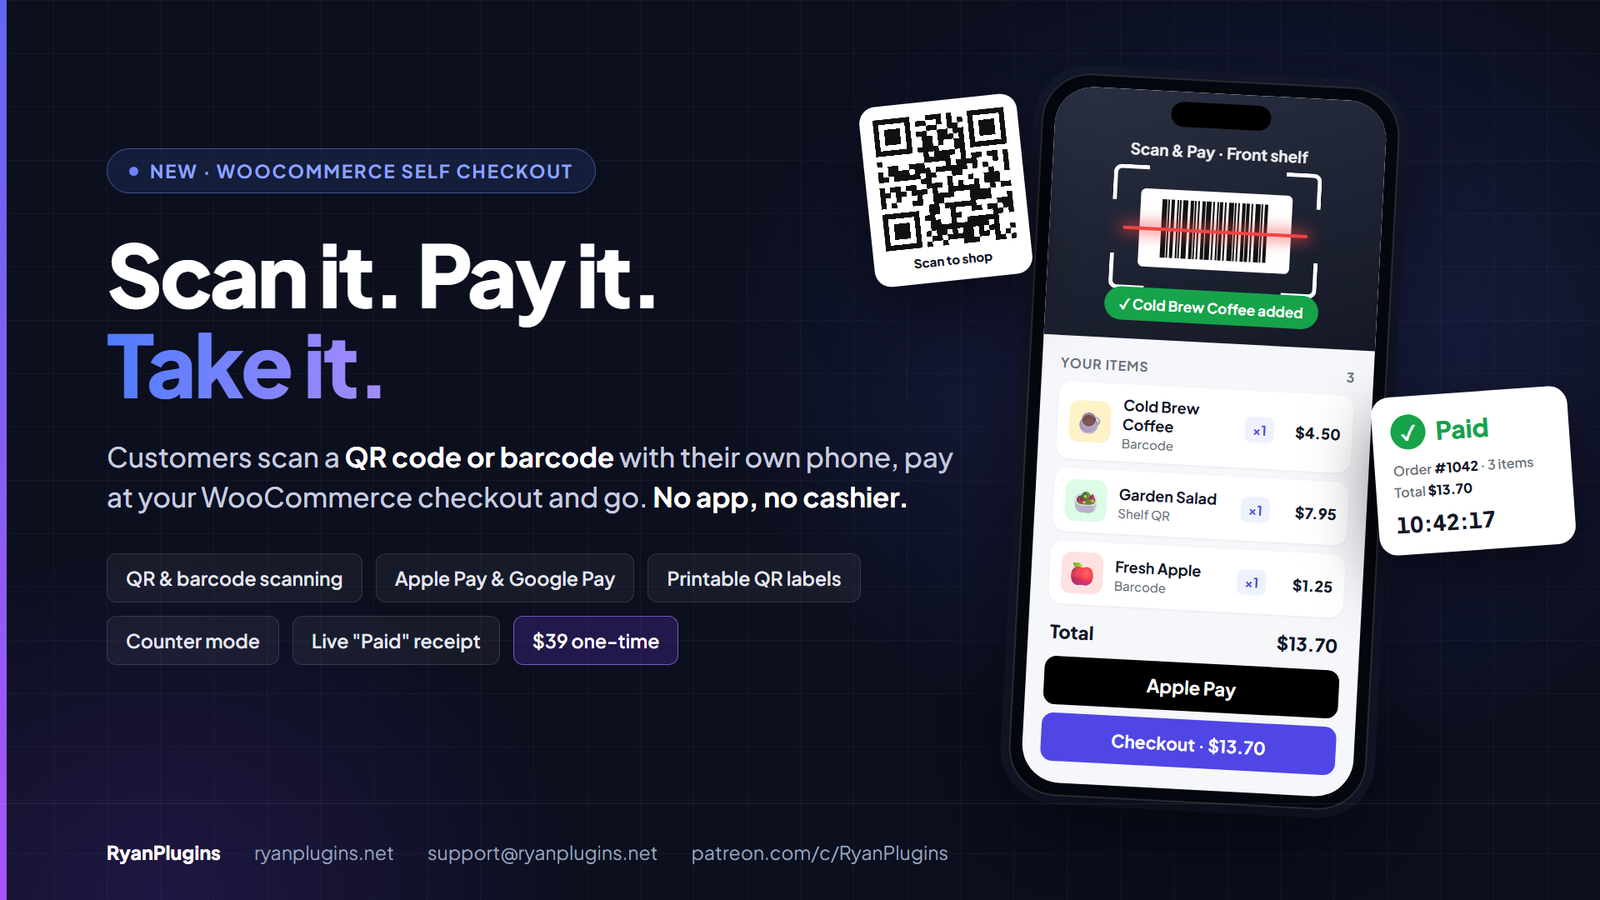
This guide walks you through setting up Scan & Pay for WooCommerce from start to finish: installing the plugin, creating the scanner page, matching your barcodes, printing QR signs and shelf labels, and testing your first self checkout order. Scan & Pay costs $39 USD, one-time purchase, and setup takes about 15 minutes.
One-time purchase. No monthly fee.
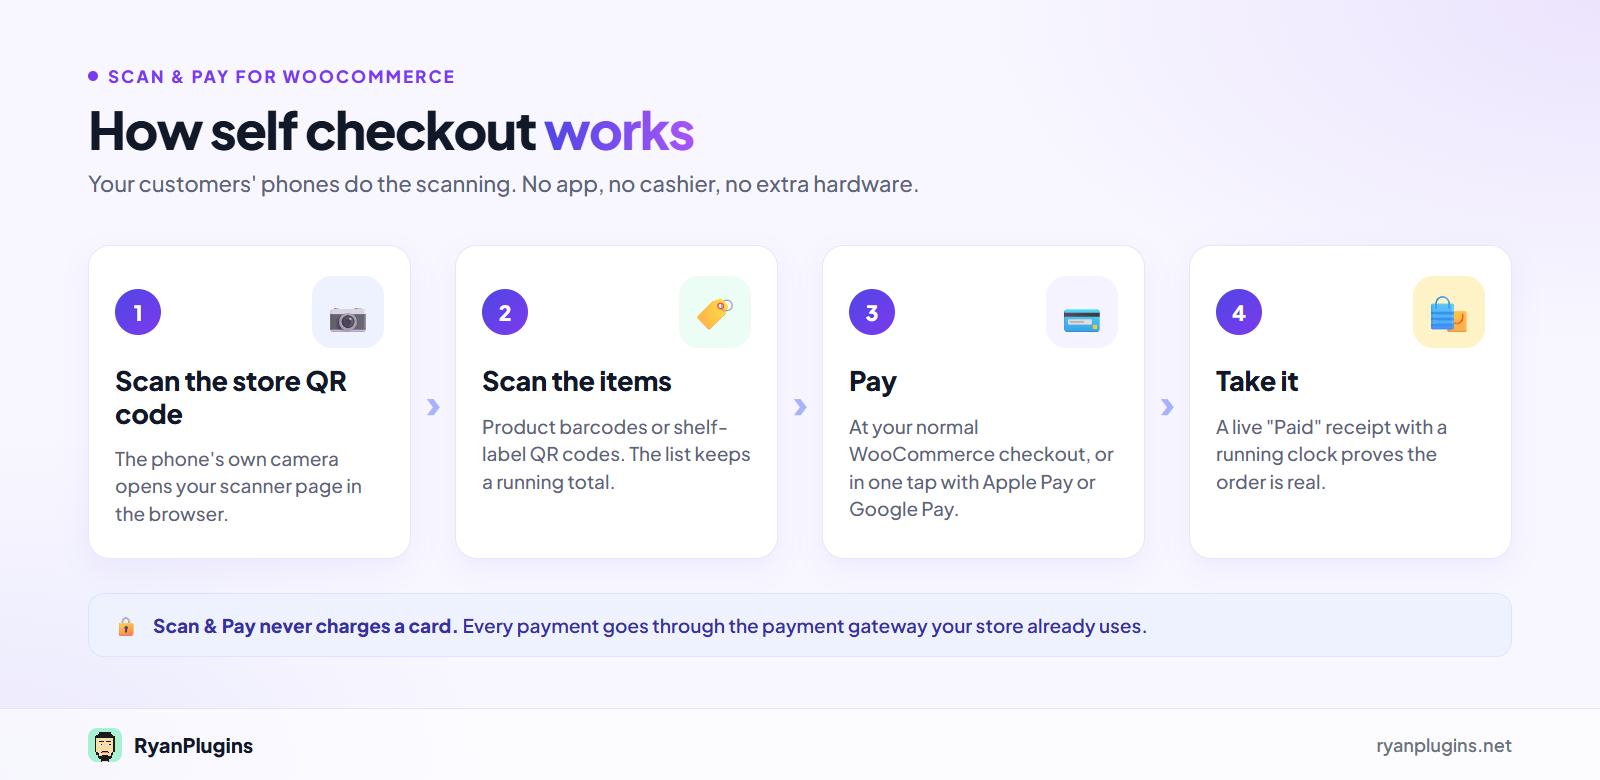
New to the plugin? Read Scan & Pay for WooCommerce: Self Checkout with QR Codes & Barcodes for an overview of what it does. In short: customers scan a QR code or an item’s barcode with their own phone, pay at your normal WooCommerce checkout, and take the item. Scan & Pay never charges a card itself. Every payment goes through the payment gateway your store already uses.
Before you start
- WordPress 6.2 or later, WooCommerce 9.2 or later, PHP 7.4 or later.
- HTTPS on your whole site. Phone browsers only allow the camera on secure pages, so the scanner won’t start on plain HTTP.
- A working payment method. Card, Apple Pay or Google Pay suit a store with nobody at the till. Bank transfer, cheque and cash on delivery don’t.
- Your plugin zip and license key. Both come with your RyanPlugins Patreon membership. You get the key from the RyanPlugins License Portal at license.ryanplugins.net.
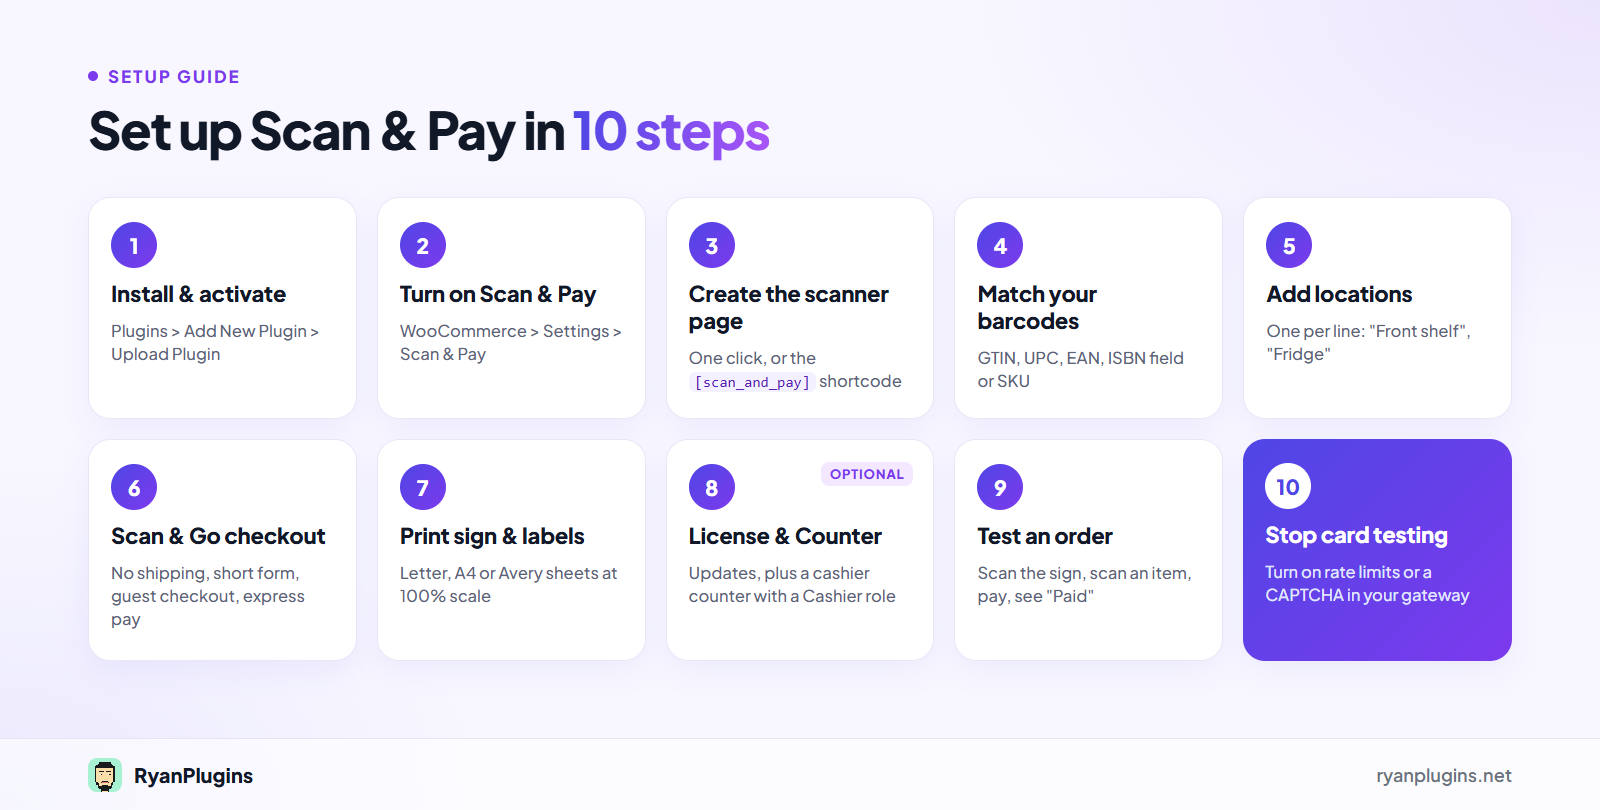
Here is the whole setup at a glance. Each step is explained in detail below.
Step 1: Install and activate the plugin
- In your WordPress dashboard, go to Plugins > Add New Plugin > Upload Plugin.
- Choose the Scan & Pay zip file and click Install Now.
- Click Activate.
Step 2: Turn on Scan & Pay
Go to WooCommerce > Settings > Scan & Pay and tick Scan & Pay (“Turn on the scanner page, QR codes and the Scan & Go checkout”). Click Save changes. Every other setting in this guide is on the same tab.
Step 3: Create the scanner page
The scanner page is where customers land when they scan your store QR code. On the Scan & Pay tab, click Create the scanner page. The plugin creates the page and selects it under Scanner page for you.
Prefer your own page? Add the [[scan_and_pay]] shortcode to any page, publish it, and choose it under Scanner page.
Leave Full screen ticked. The scanner page then opens like an app, without your theme’s header, footer and sidebar, so the camera starts right on screen.
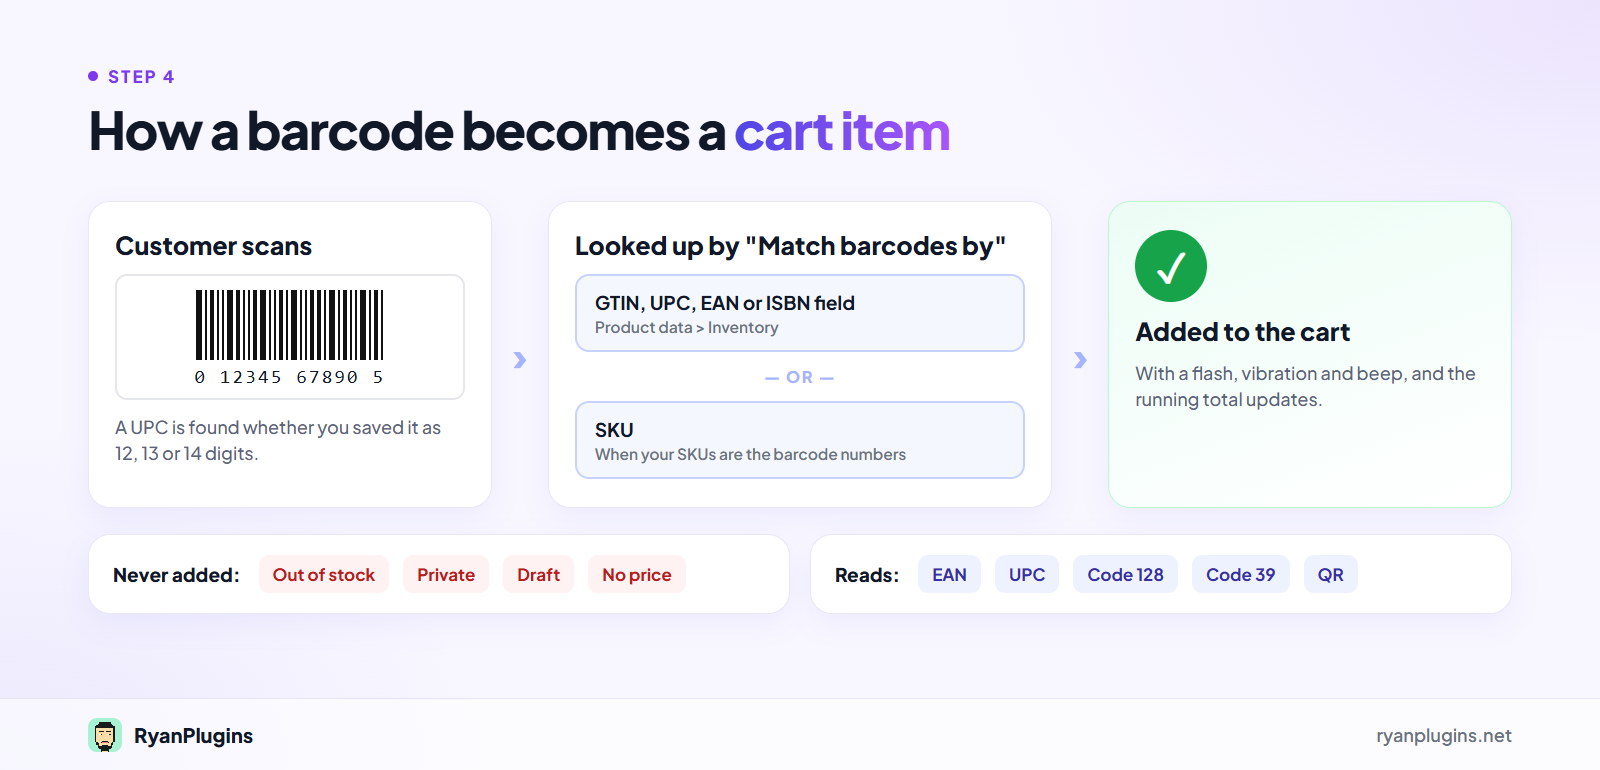
Step 4: Make sure your barcodes match
When a customer scans an item, Scan & Pay looks the barcode up in your products. Choose where it looks under Match barcodes by:
- GTIN, UPC, EAN or ISBN field: open a product and find it under Product data > Inventory. Type the number printed under the item’s barcode. A UPC is found whether you saved it as 12, 13 or 14 digits.
- SKU: if your SKUs already are the barcode numbers, matching by SKU works too.
The scanner reads EAN, UPC, Code 128 and Code 39 barcodes as well as QR codes. Out-of-stock, private, draft and unpriced products are never added, so check stock and prices before you open. Items without a barcode get a printed shelf label in Step 7.
Step 5: Add your locations
If you sell from more than one spot, type each one under Locations, one per line, such as “Front shelf” or “Fridge”. Each location gets its own QR code, and every order records where it was scanned. With a single spot, leave this empty and use the store QR code.
Renaming a location changes its QR code, so reprint that sign after a rename.
Step 6: Set up the Scan & Go checkout
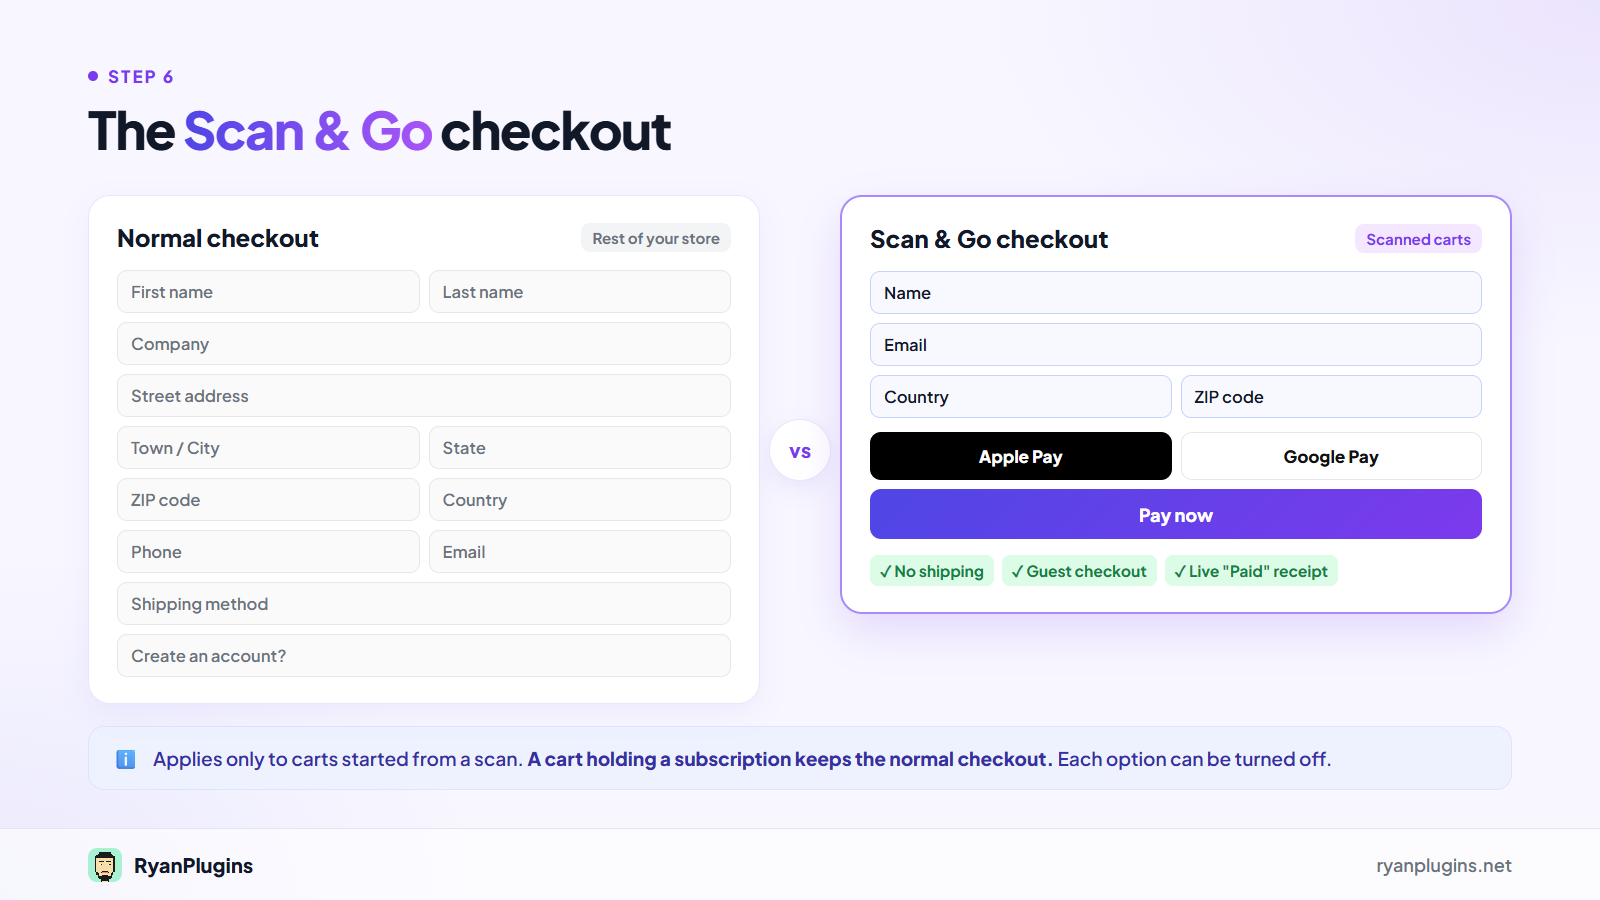
These options apply only to carts started from a scan. The rest of your store, and any cart holding a subscription, checks out as usual. All four are on by default, and each can be turned off:
- No shipping: items are taken from the shelf.
- Short form: ask only for name, email, country and ZIP code. The ZIP code stays because card gateways use it for address verification.
- Allow guest checkout: customers pay without creating an account.
- Live “Paid” receipt: shown on the order received page, with the order number and a running clock, so a screenshot of someone else’s receipt can be told apart.
Under Payment methods, pick the methods scanned carts are offered, for example only Apple Pay, Google Pay and card. Leave it empty to offer every method your checkout has.
Tick Express pay to show Apple Pay and Google Pay right under the scanned items on the scanner page. The wallet supplies the name, email and ZIP code, so customers pay in one tap without typing anything. The buttons appear when your payment plugin offers them; accept.blue Payment Gateway v2 does.
Step 7: Print your store sign and shelf labels
Make the sign your own
Under Store sign, add your Logo (a wide logo on a transparent background works best), and change the Headline, Intro line, the three steps (Scan, Pay, Take it) and the Footer if you like. Leave a text empty to keep the default wording. Pick a Background colour and an Accent colour for the step circles. Click Save changes.
Choose which products get labels
Shelf labels carry each product’s name, price and QR code, for items with no barcode. Under Shelf labels > Products, choose all products, some categories, or hand-picked products. A variable product has no single price or QR code, so pick its variations one by one under Products to label.
Under Sheet, choose Letter or A4 to cut out, or Avery 5163 / 8163 or L7163 sticker sheets.
- Find the QR codes table on the Scan & Pay tab. It has one row for the store and one per location.
- Click Store sign or Shelf labels on a row. It opens in a new tab.
- Click Print. Set the scale to 100% (“Actual size”), not “Fit to page”, so labels line up with sticker sheets.
Need the QR code for your own design or a printing shop? Click Download SVG on the row.
Post the store sign where customers will see it, such as at the entrance or on the fridge door, and stick each shelf label next to its product.
Step 8: Activate your license and turn on the Counter (optional)
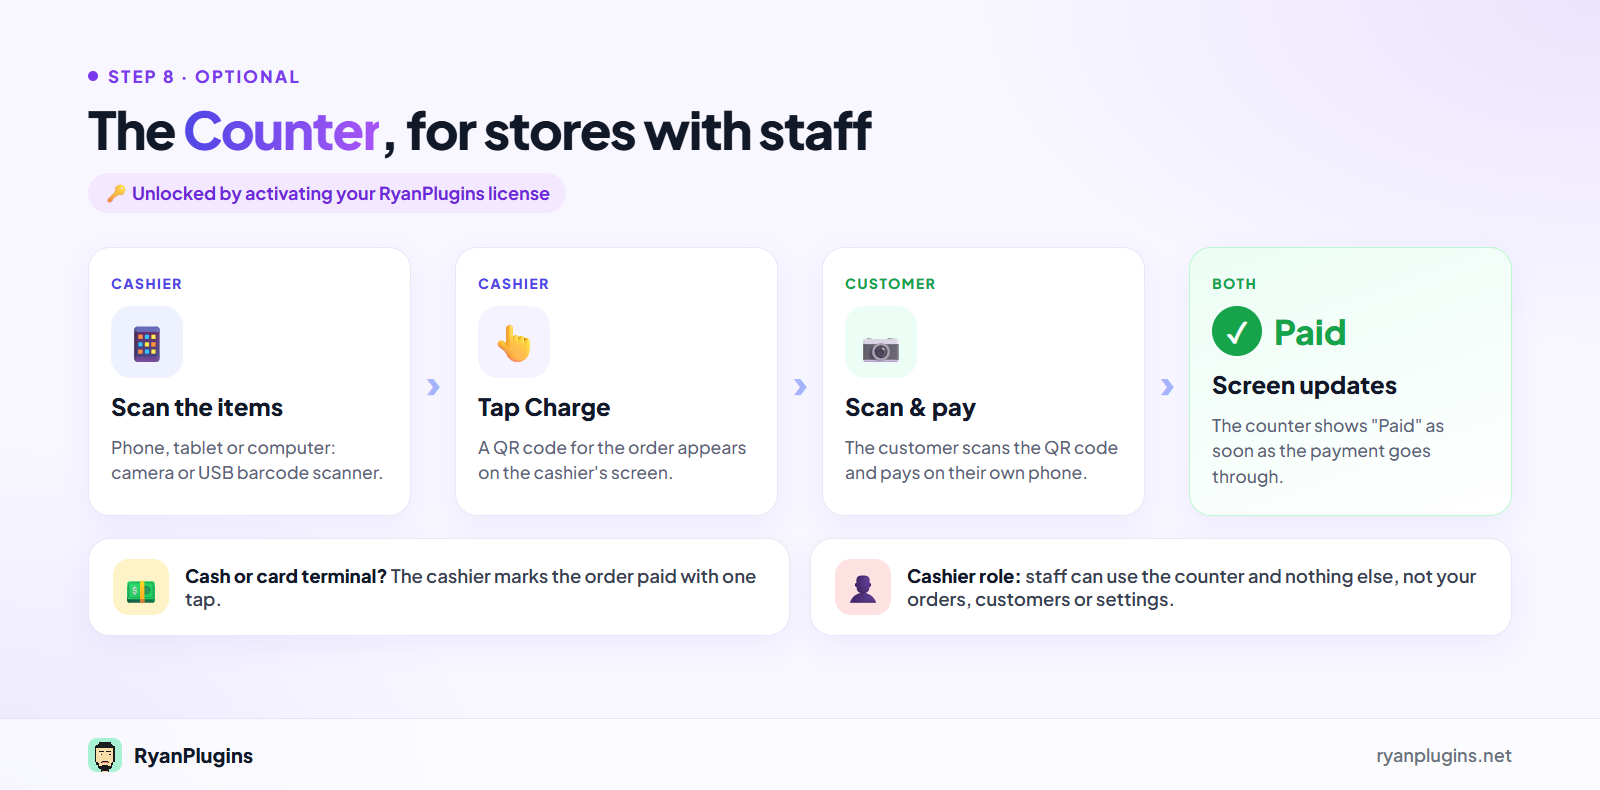
Self-serve Scan & Pay works without a license. Activating your license key adds automatic updates and unlocks the Counter, for stores where a cashier helps out.
- Go to WooCommerce > Settings > Scan & Pay > License, paste the key from the RyanPlugins License Portal, and activate it. New versions then show on the Plugins screen, and “Enable auto-updates” works on the plugin’s row.
- Back on the Scan & Pay tab, tick Counter and save.
- For staff, go to Users > Add New User and give them the Cashier role. A cashier can use the counter and nothing else in the dashboard: no orders, customers or settings.
- On the till’s phone, tablet or computer, open WooCommerce > Scan & Pay counter.
At the counter, the cashier scans the items with the camera or a USB barcode scanner and taps Charge. The customer scans the QR code on the cashier’s screen and pays on their own phone, and the screen shows “Paid” as soon as they have. A customer paying cash or on a card terminal is marked paid with one tap. If a Patreon membership ends, the Counter keeps working; only updates stop.
Step 9: Test your first order
- Scan your printed store sign with your phone’s own camera app. The scanner page should open.
- Allow the camera when the browser asks.
- Scan a product barcode and a shelf label. Each scan flashes, vibrates and beeps, and the item list keeps a running total. If a code won’t scan, tap Type a code.
- Pay at checkout or with Apple Pay or Google Pay, and check that the live “Paid” receipt appears.
- Open WooCommerce > Orders. The new order shows in the Scan location column, and the order records how it was started (store QR code, product QR code or barcode).
Step 10: Protect your store from card testing
An unattended store is an easy target for card testing, where fraudsters try stolen card numbers with small purchases. Scan & Pay doesn’t charge cards itself, so turn on your payment gateway’s own protection, such as rate limits, a CAPTCHA, or a bot check at checkout.
Troubleshooting
- The camera doesn’t start. Check that the page address starts with https://, and that the camera is allowed for your site in the phone’s browser settings.
- A barcode scans but nothing is added. Check that the number is in the field chosen under Match barcodes by, and that the product is published, in stock and has a price.
- A product has no label. Out-of-stock, unpriced and unpublished products are always left out. For a variable product, label each variation.
- Labels don’t line up with the sticker sheet. Print at 100% scale (“Actual size”), not “Fit to page”.
- A location sign stopped working. Renaming a location changes its QR code. Reprint that sign.
Pricing
Scan & Pay for WooCommerce
$39 USD
One-time purchase. No monthly fee.
- ✓ Scanner page, QR signs and shelf labels
- ✓ Scan & Go checkout and express pay
- ✓ Counter mode with a Cashier role
- ✓ No cut of your sales
You pay $39 USD once. Scan & Pay never takes a percentage of your sales, because payments go straight through your own WooCommerce payment gateway at its normal rates.
Frequently asked questions
How much does Scan & Pay for WooCommerce cost?
Scan & Pay for WooCommerce costs $39 USD as a one-time purchase. There is no monthly fee, and the plugin never takes a cut of your sales, because every payment goes through your own WooCommerce payment gateway.
Is it compatible with my WooCommerce store?
Scan & Pay needs WordPress 6.2 or later, WooCommerce 9.2 or later and PHP 7.4 or later. It works with both the classic and the block checkout, with High-Performance Order Storage, and with the payment methods your checkout already offers.
What do I need before I set it up?
You need HTTPS on your site, because phone browsers only allow the camera on secure pages. You also need a payment method that suits a store with no cashier, such as card, Apple Pay or Google Pay, and barcode numbers or SKUs saved on your products. Setup takes about 15 minutes.
Do I need to activate a license to use it?
No. Self-serve Scan & Pay works without a license. Activating your license key from the RyanPlugins License Portal adds automatic updates and unlocks the Counter for stores with a cashier.
Is it secure for an unattended store?
Scan & Pay never charges a card itself, so card details only ever go to your own payment gateway. Out-of-stock, private and unpriced products are never added to the cart, and the live Paid receipt shows the order number and a running clock, so an old screenshot can be told apart from a real receipt. Also turn on the card testing protection in your payment gateway, such as rate limits or a CAPTCHA at checkout.
Does the scanner work on iPhone?
Yes. Safari has no built-in barcode reader, so the scanner page loads a bundled reader on iPhone. Other phones use the barcode reader built into the browser where one is available. Customers need no app.
Ready to open your self checkout?
Ten steps, one printed sign, and your WooCommerce store sells around the clock without a cashier. Scan & Pay for WooCommerce is $39 USD, one-time purchase.