Cybersource Unified Checkout lets your WooCommerce store accept card payments — including Click to Pay — with built-in fraud screening and 3D Secure protection. This guide walks you through the full setup step by step, so nothing gets missed. Follow the steps in order — each one builds on the last.
You will need
- Merchant access to your Cybersource Business Center account.
- Admin access to your WordPress/WooCommerce dashboard.
- The WooCommerce Cybersource Payment Gateway plugin (version 2.5.x or later).
- About 30–45 minutes to complete the full setup.
Note: Screenshots in this guide are for reference. Menu names and layout may look slightly different depending on your Cybersource account type, but the steps remain the same.
What this guide covers
- Turning on Unified Checkout in Cybersource
- Turning on fraud protection (Decision Manager)
- Turning on device fingerprinting
- Setting up 3D Secure
- Generating your API credentials
- Installing the WooCommerce plugin
- Turning on Click to Pay
- Turning on Unified Checkout for card payments
- Connecting your API credentials to WooCommerce
- Previewing the checkout experience
Section 1 — Turn On Unified Checkout
Unified Checkout is Cybersource’s secure, hosted card-payment form. This section shows you where to switch it on and enable card payments and Click to Pay.
Step 1. Log in to Cybersource
Log in to your Cybersource Business Center account.
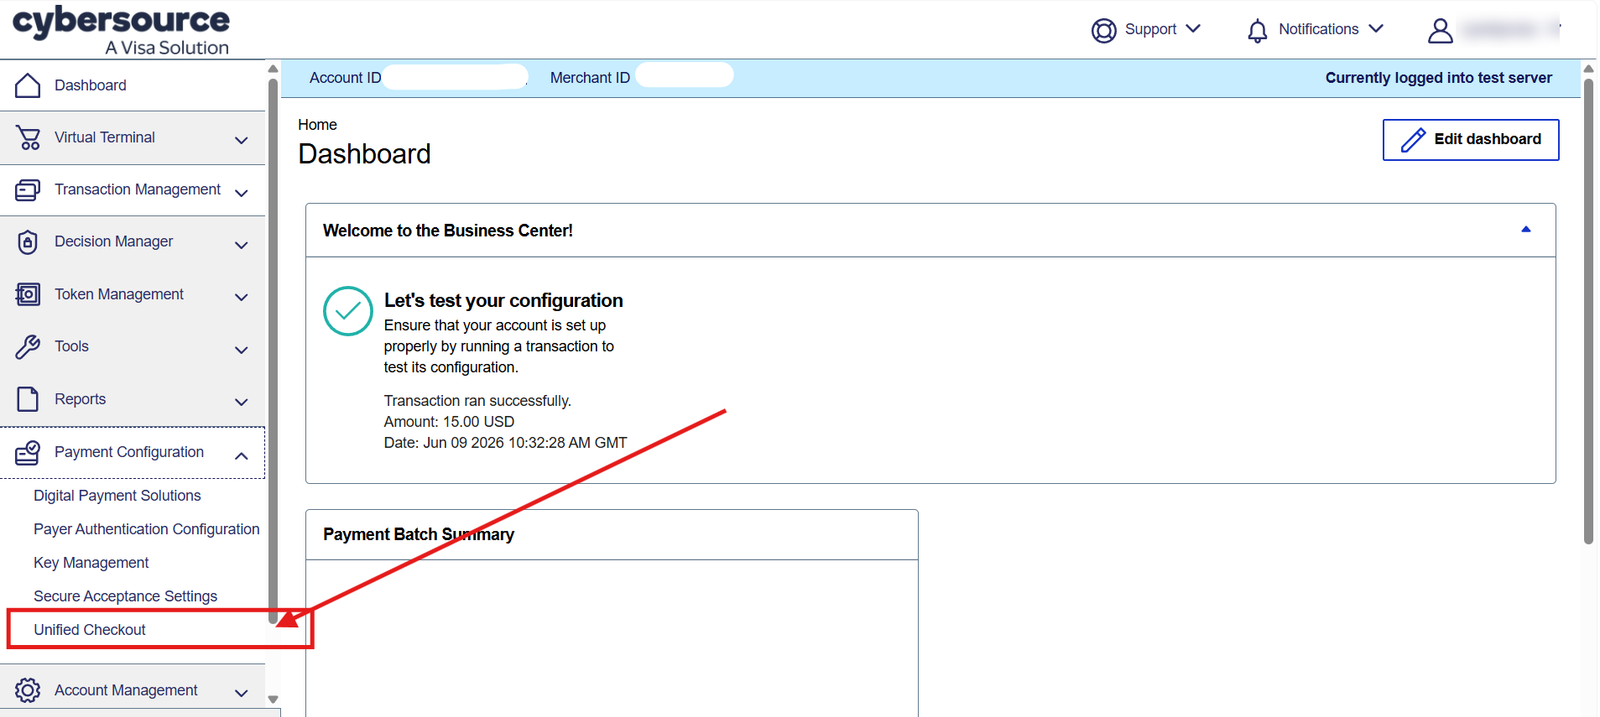
Menu path: Dashboard menu › Unified Checkout
Confirm that Unified Checkout is turned on for your account. If you don’t see this option, contact Cybersource support to have it enabled first.
Step 2. Turn on Card Payments and Click to Pay
Menu path: Unified Checkout › Payment Options › Manage
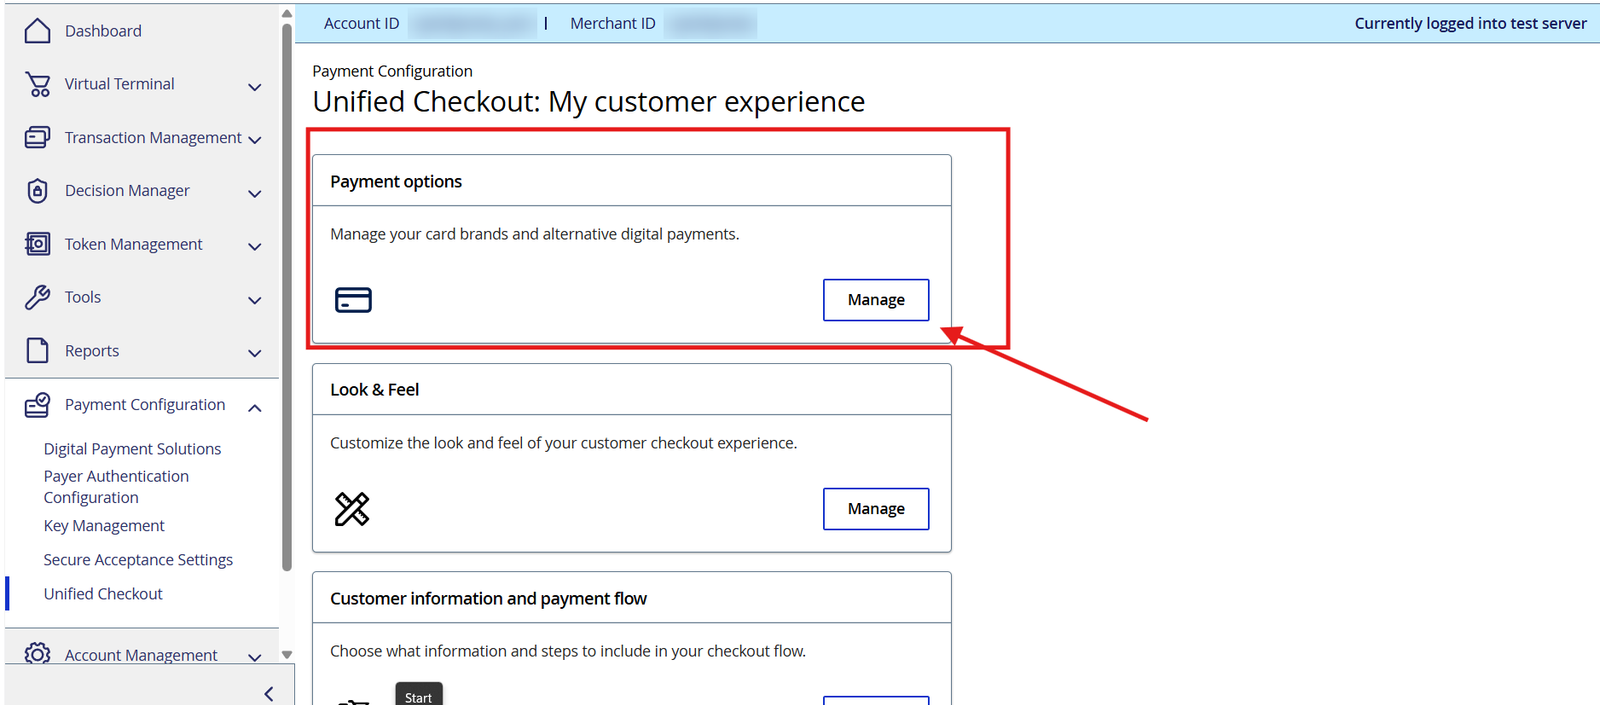
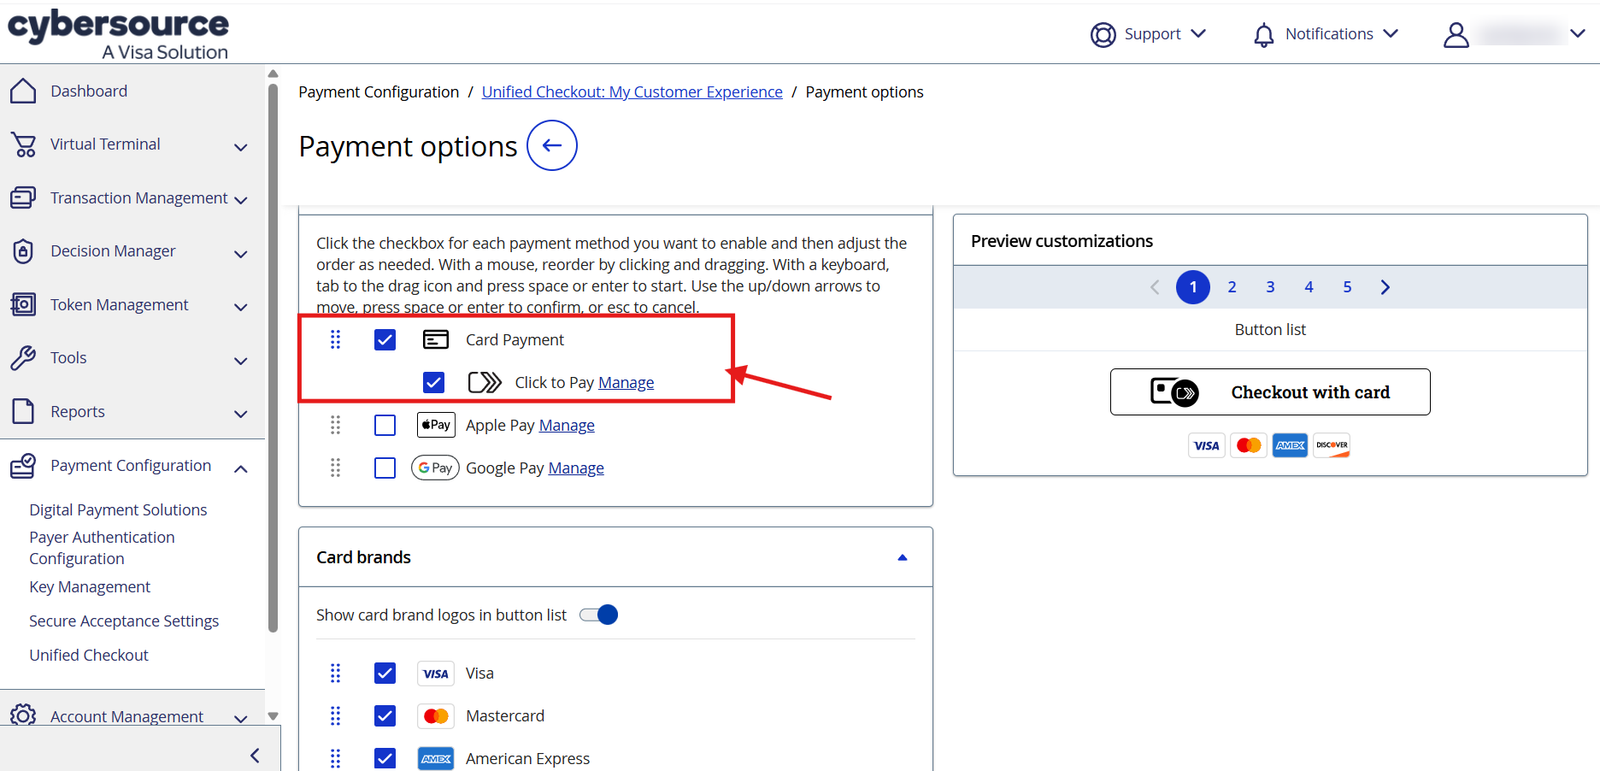
Step 3. Confirm both options are checked
Make sure both “Card payment” and “Click to Pay” are checked, then select Manage to continue.
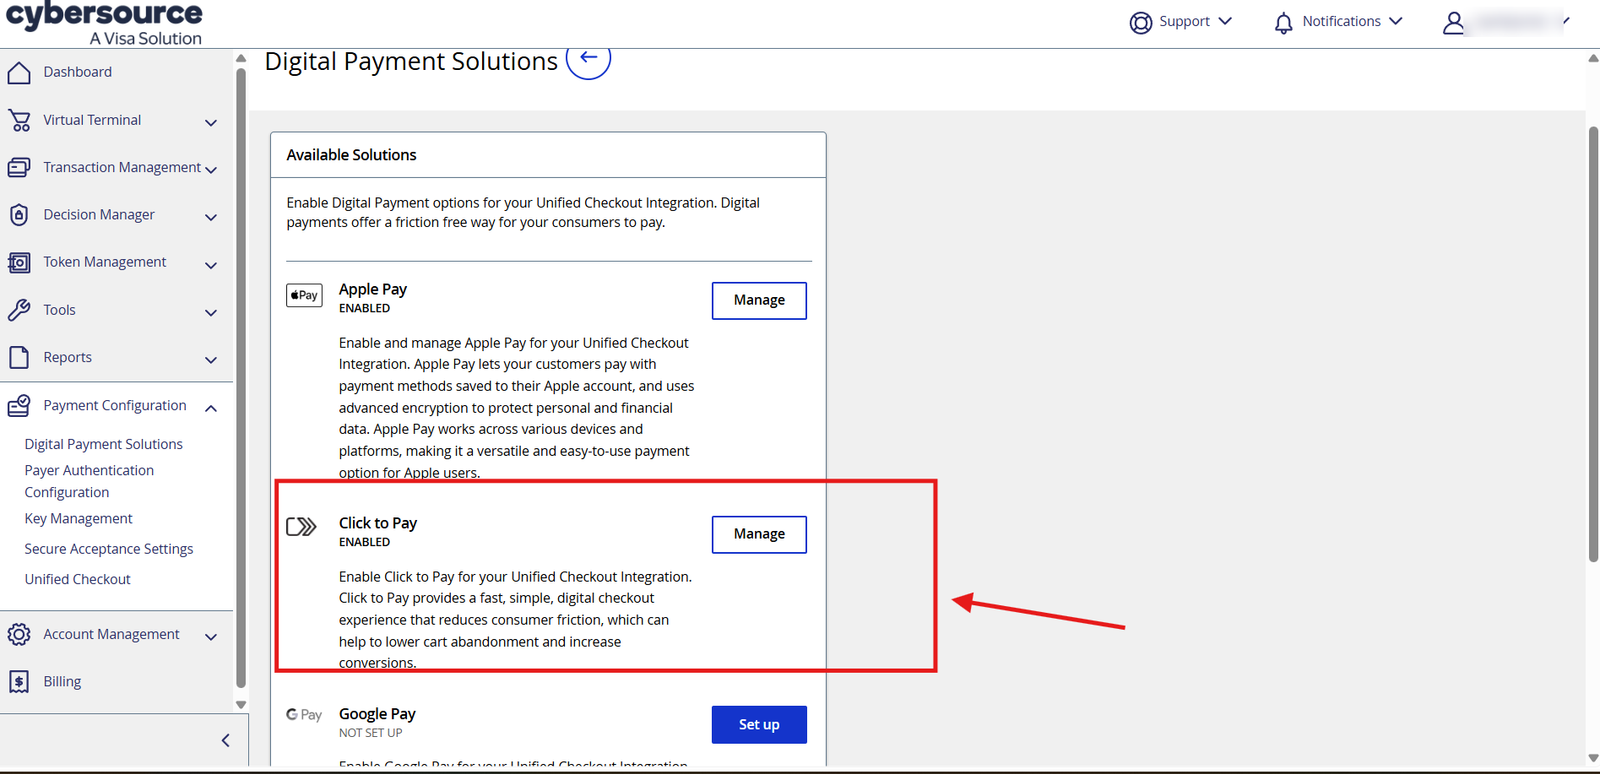
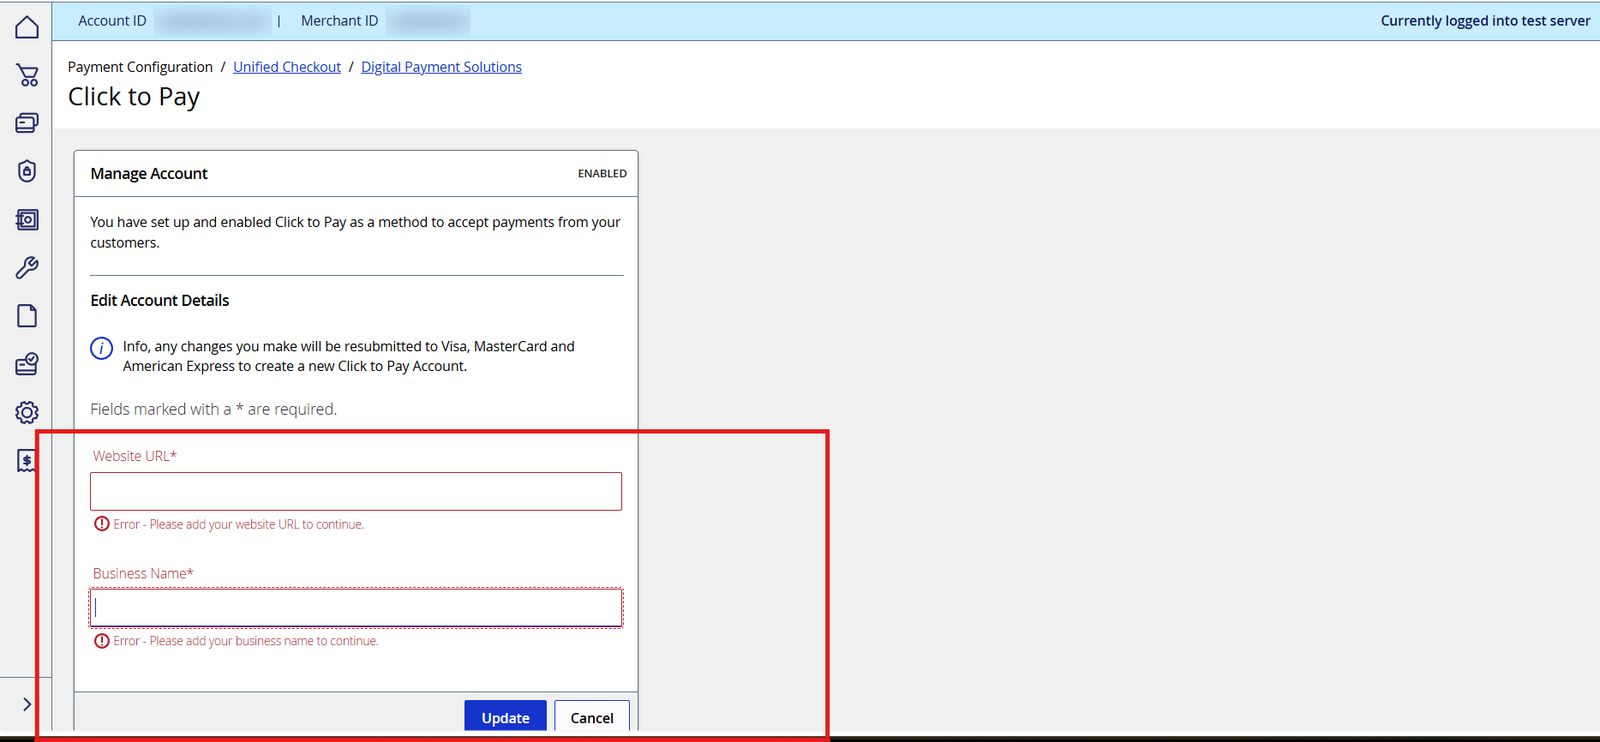
Step 4. Update your payment details
Review and update the payment details shown on this screen to match your business information.
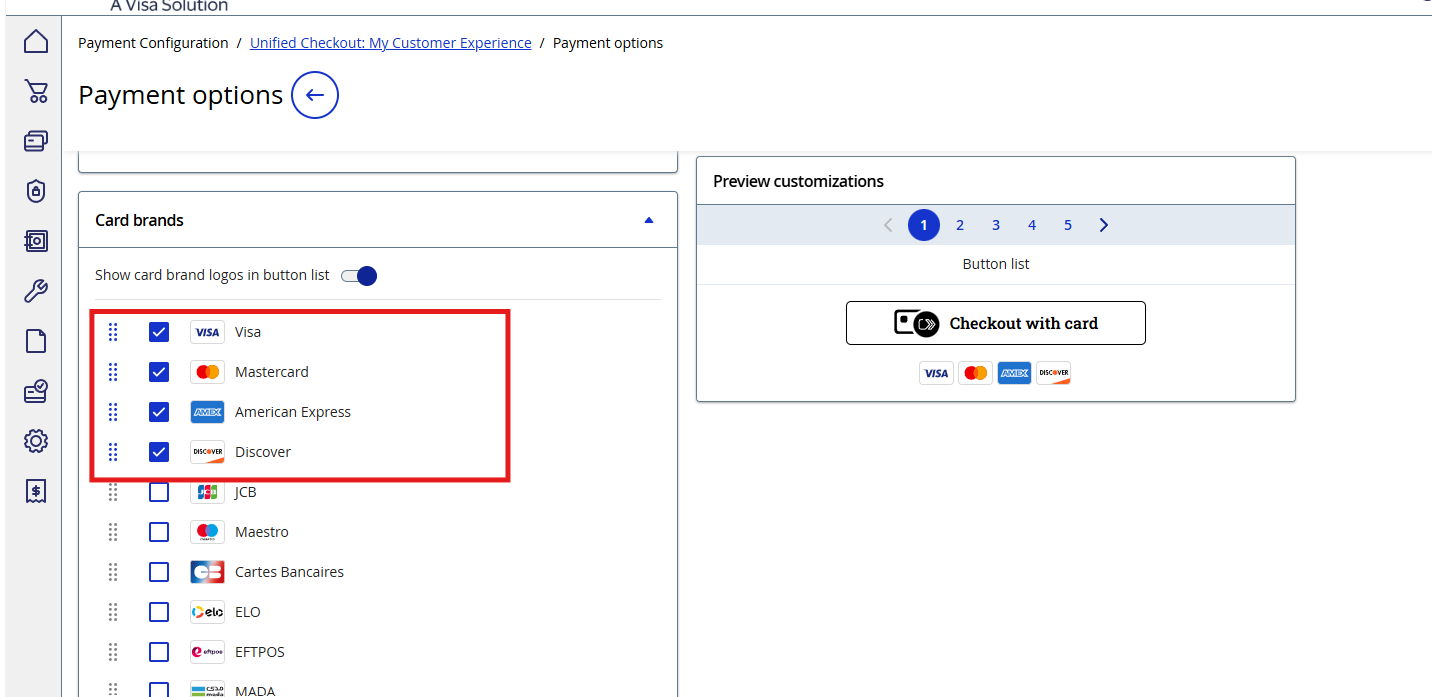
Step 5. Choose your card brands and save
Select which card brands and logos you want customers to see at checkout, then click Save and Publish.
Section 2 — Turn On Fraud Protection
Decision Manager automatically screens transactions for fraud, helping protect your store and your customers.
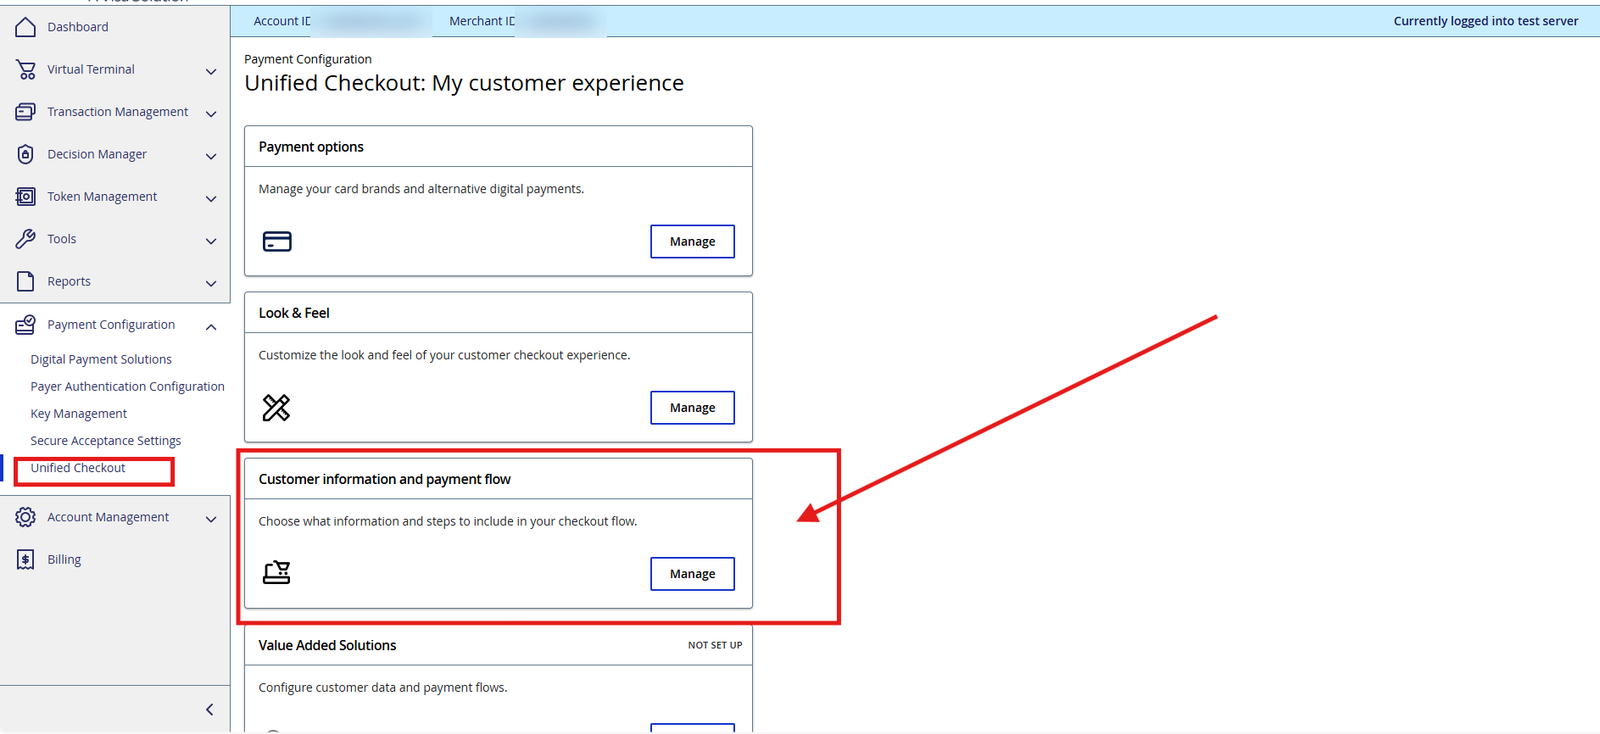
Step 6. Open the payment flow settings
Menu path: Unified Checkout › Customer Information and Payment Flow › Manage
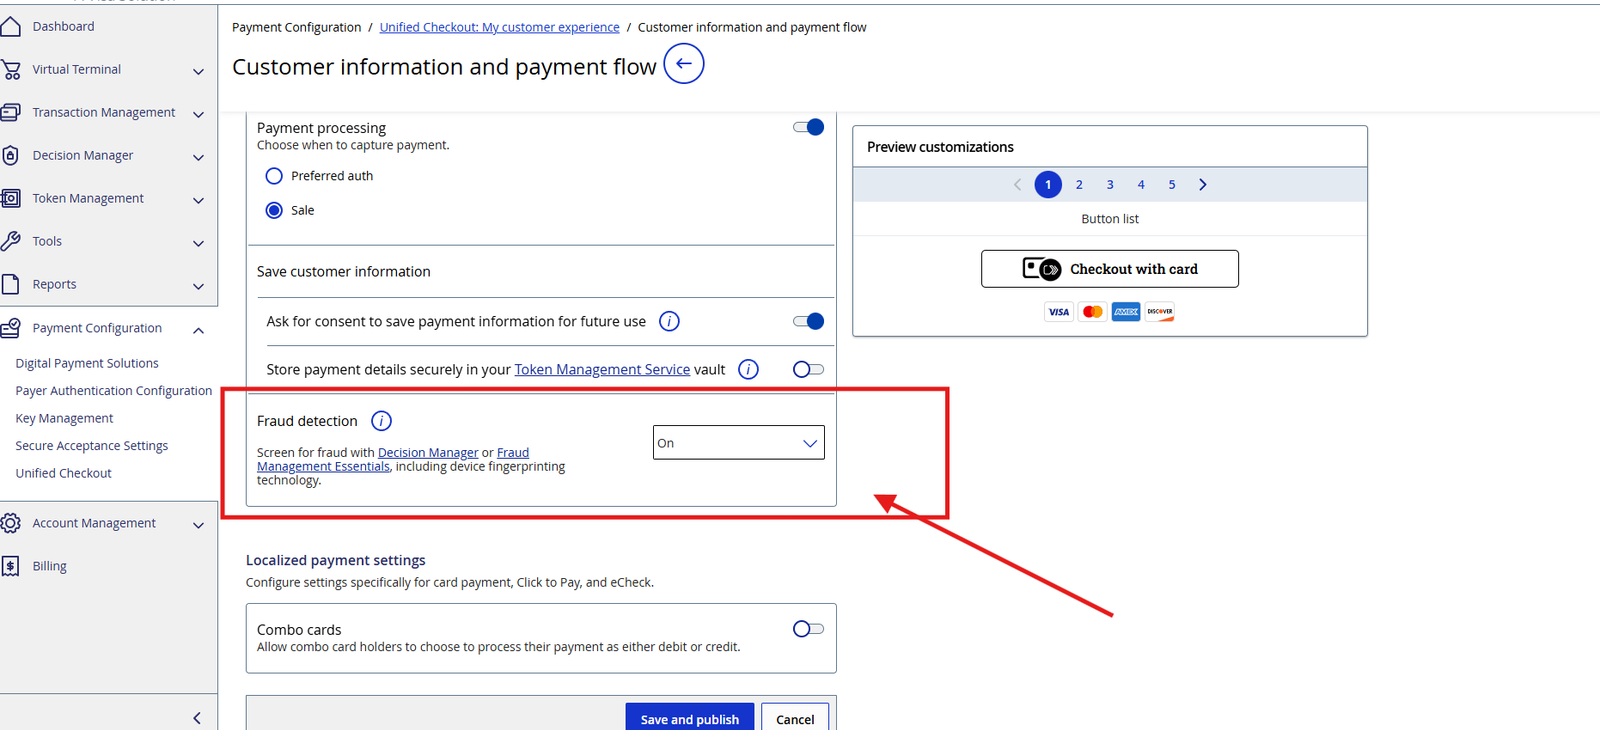
Step 7. Turn on fraud protection
Switch on fraud protection. This screens each transaction using Decision Manager together with device fingerprinting.
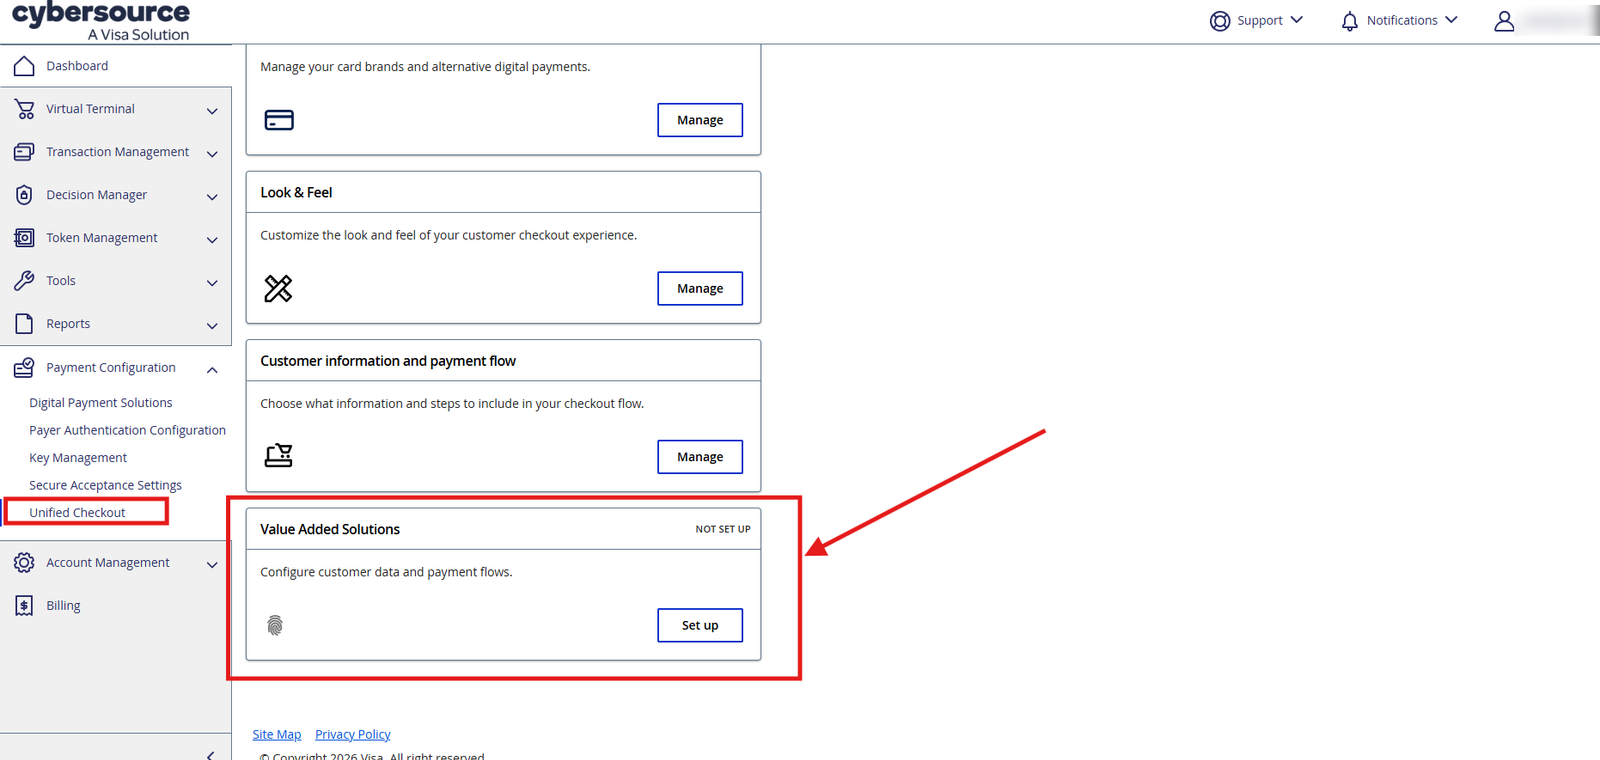
Section 3 — Turn On Device Fingerprinting
Device fingerprinting adds an extra layer of fraud detection by identifying the device used during checkout.
Step 8. Activate fingerprinting
Menu path: Unified Checkout › Value Added Solutions › Setup
Confirm that fingerprinting is activated on your merchant account.
Section 4 — Set Up 3D Secure
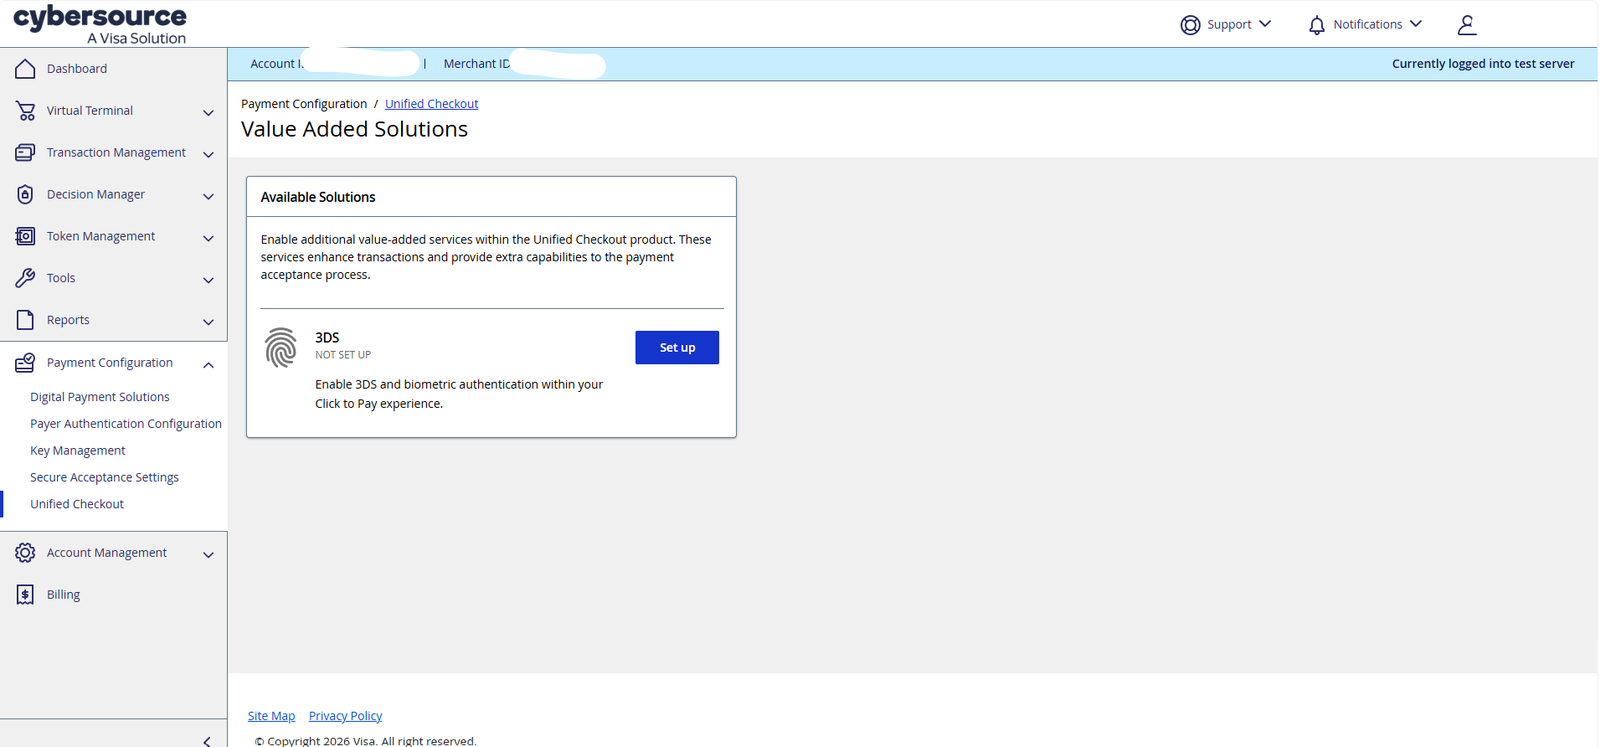
3D Secure (3DS) adds a verification step for card payments, reducing fraud and chargebacks.
Step 9. Open the 3D Secure setup screen
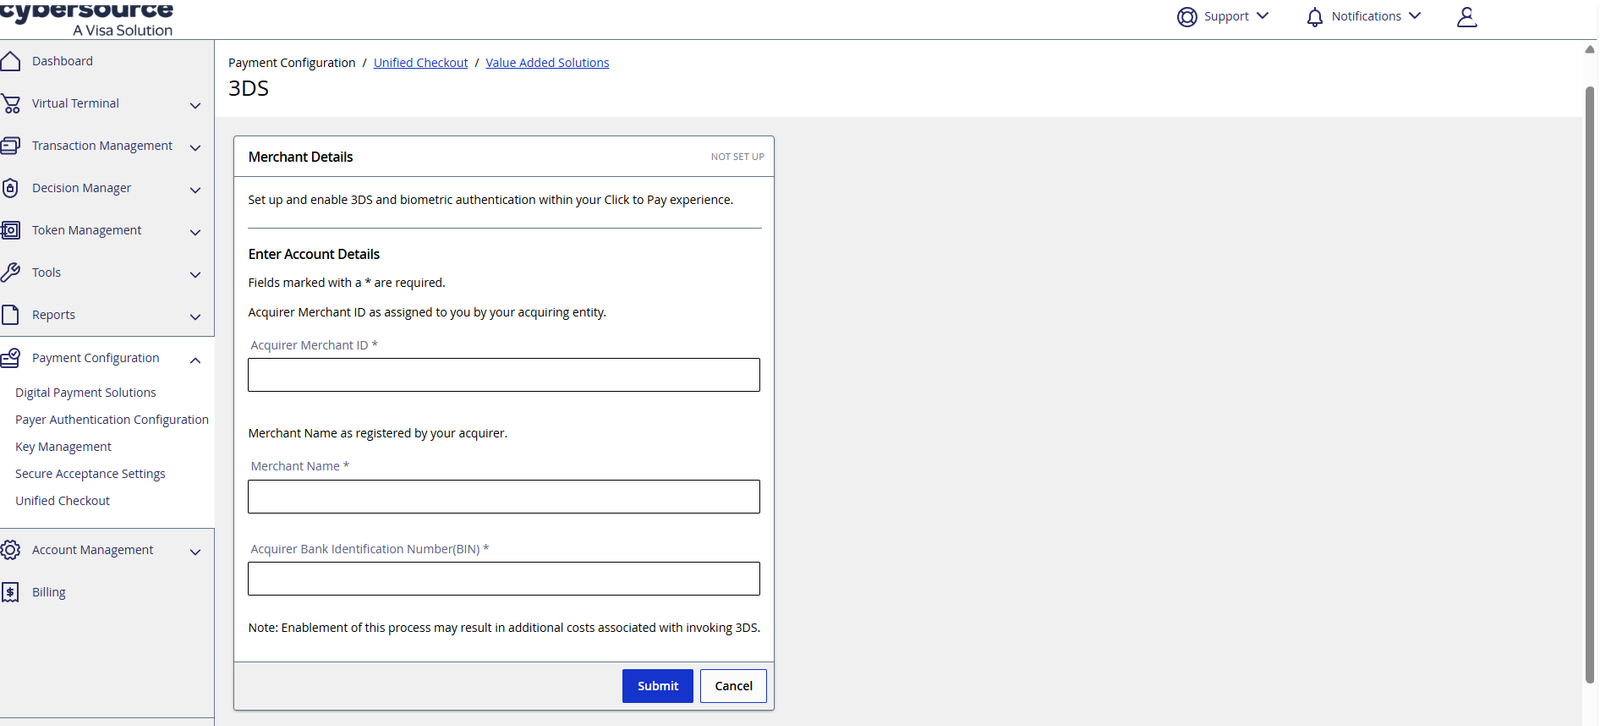
Step 10. Fill in the required information
Complete the form with your business details, then click Submit.
Section 5 — Generate Your REST API Credentials
These credentials let your WooCommerce store communicate securely with Cybersource. Keep them private, just like a password.
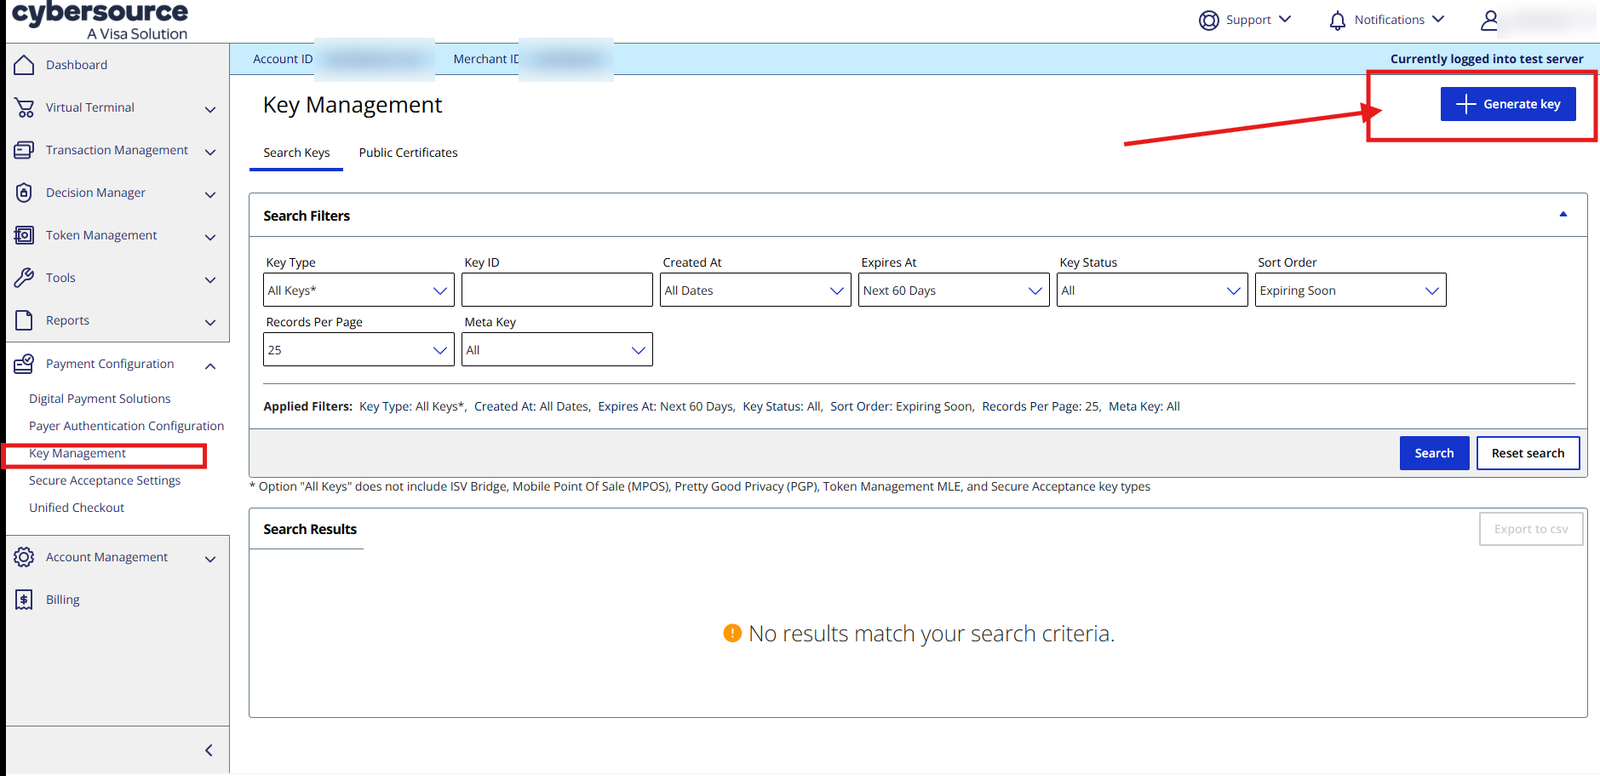
Step 11. Generate a key
Menu path: Key Management › Generate Key
Step 12. Generate your REST certificate
Menu path: REST API › REST Certificates › Generate (button at the bottom of the page)
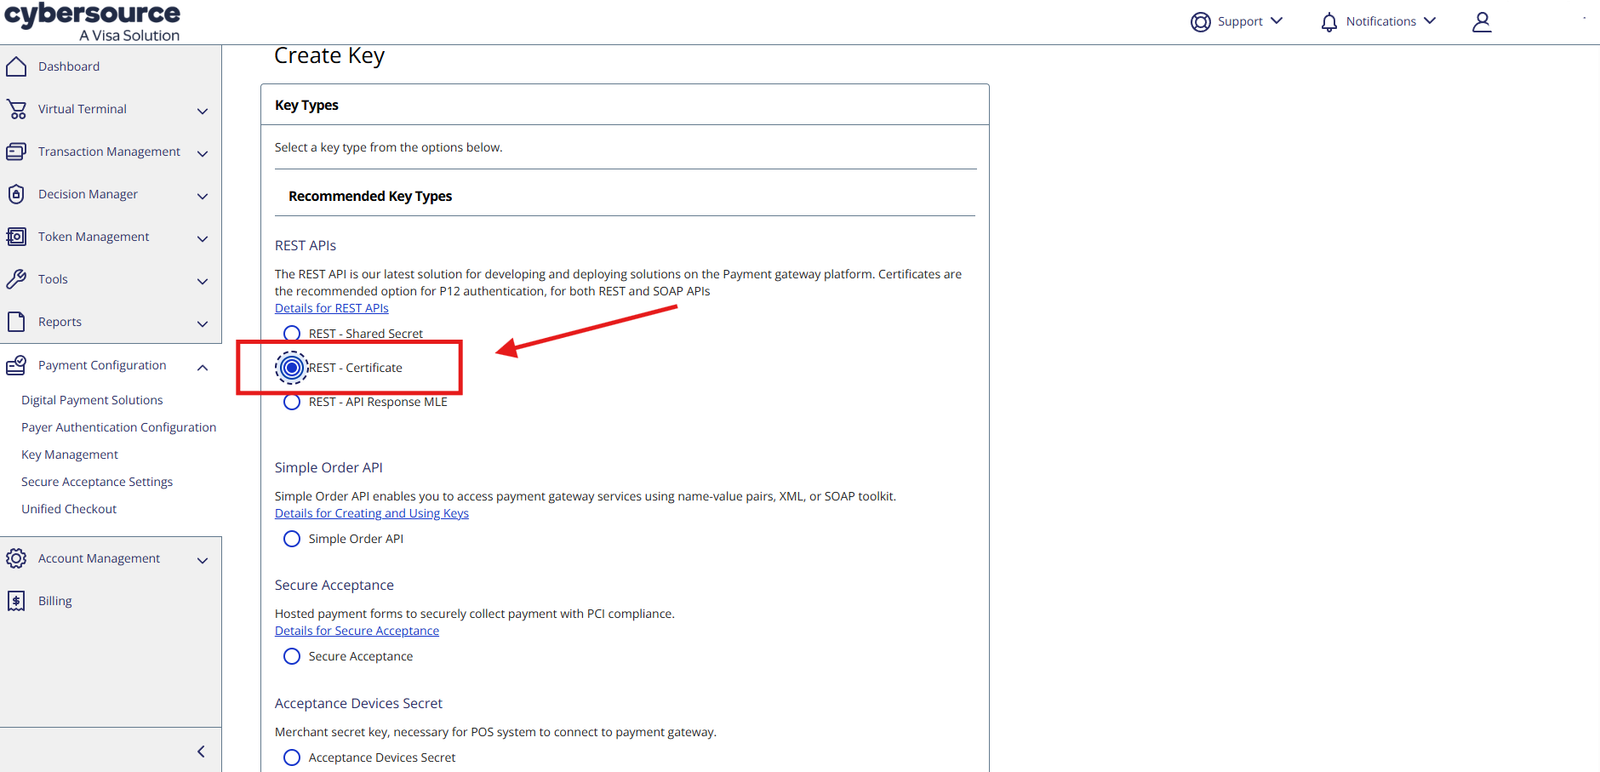
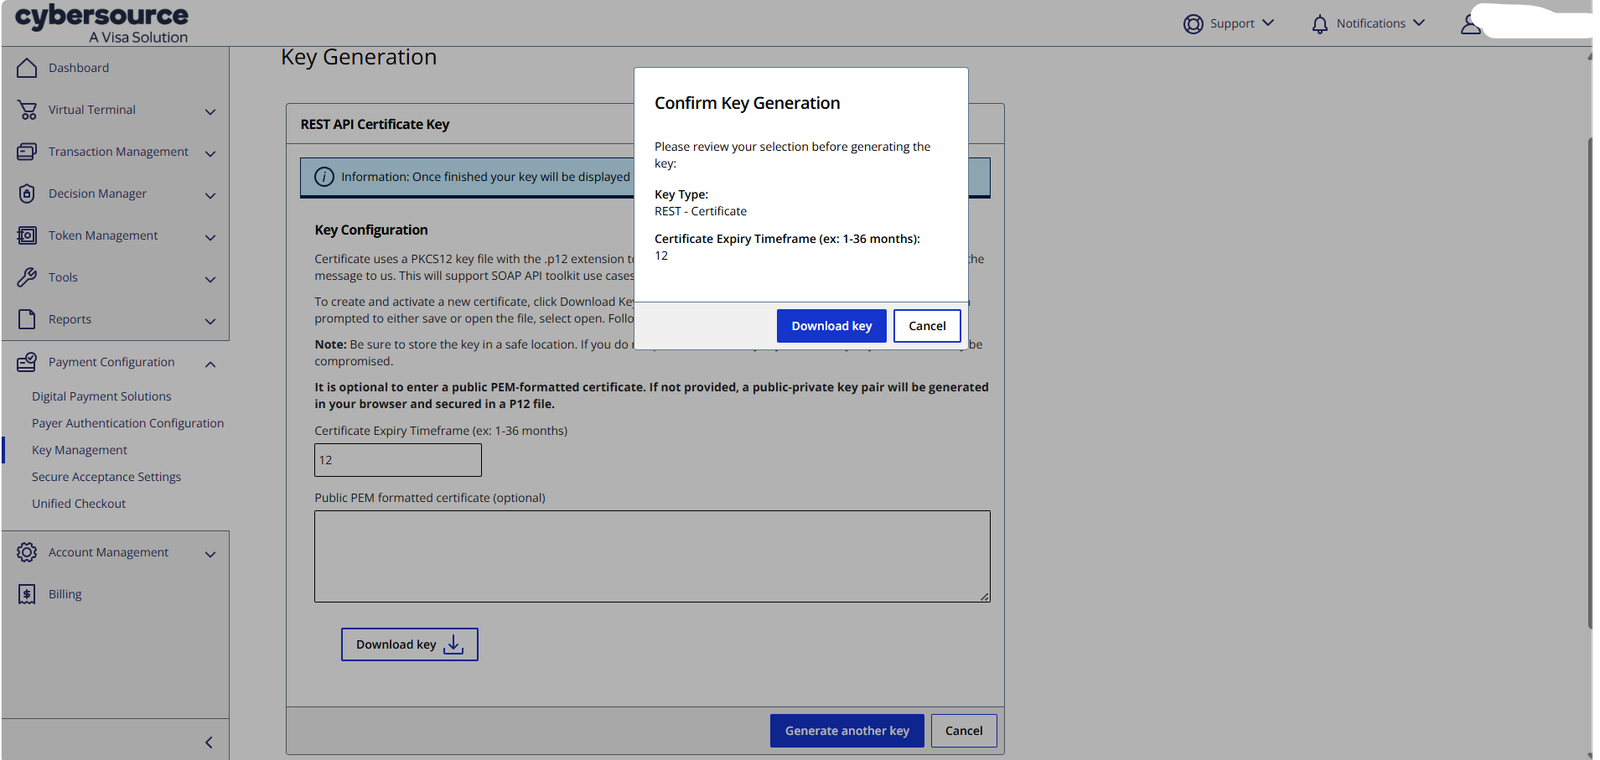
Step 13. Download the certificate and create a password
Download the certificate file and set a password for it. You’ll need both the file and the password later when connecting WooCommerce.
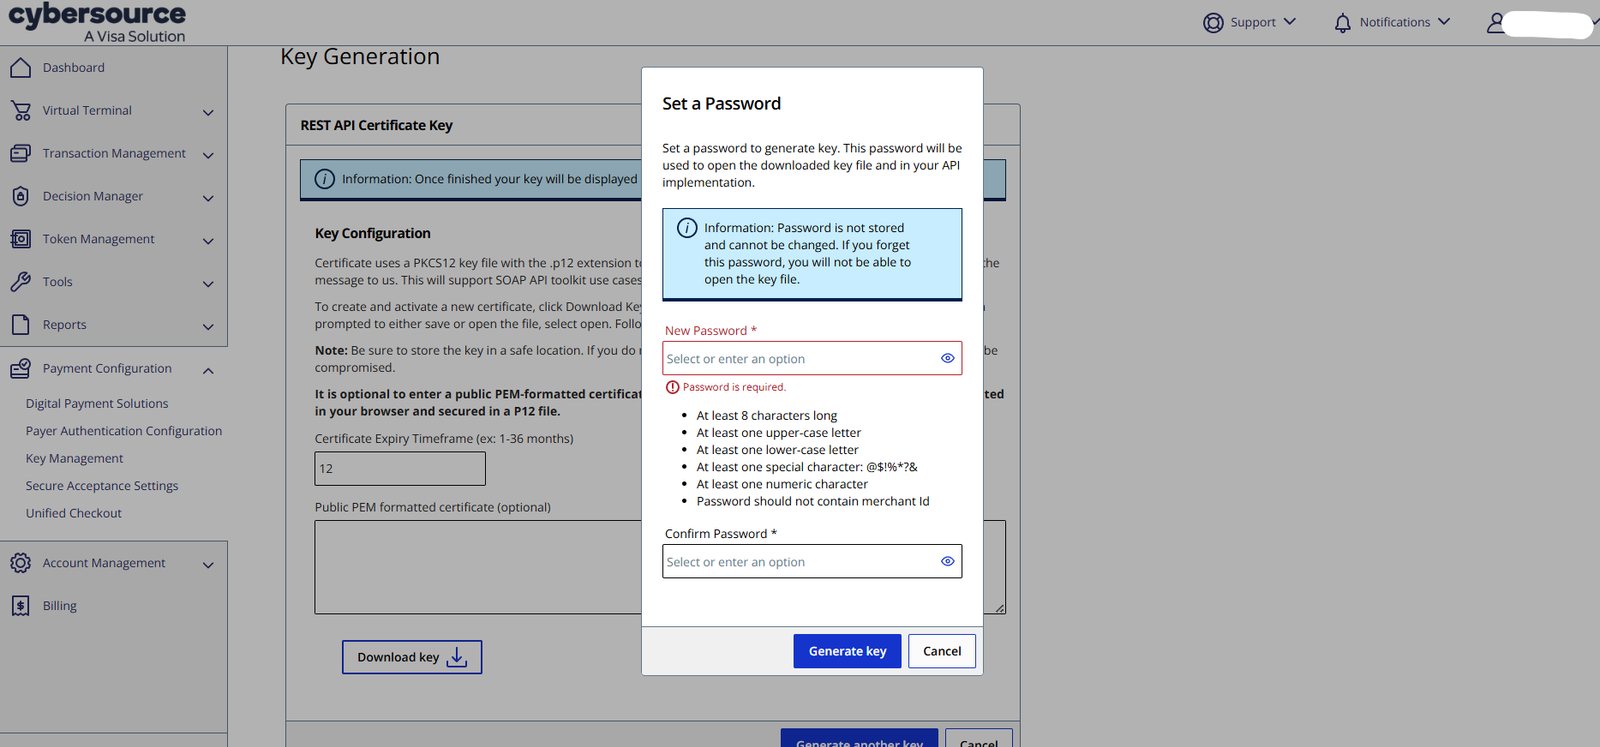
Note: Save this password somewhere safe. You will enter it into WooCommerce in Section 9.
Section 6 — Install the WooCommerce Plugin
Now switch to your WordPress dashboard to install the payment gateway plugin that connects WooCommerce to Cybersource.
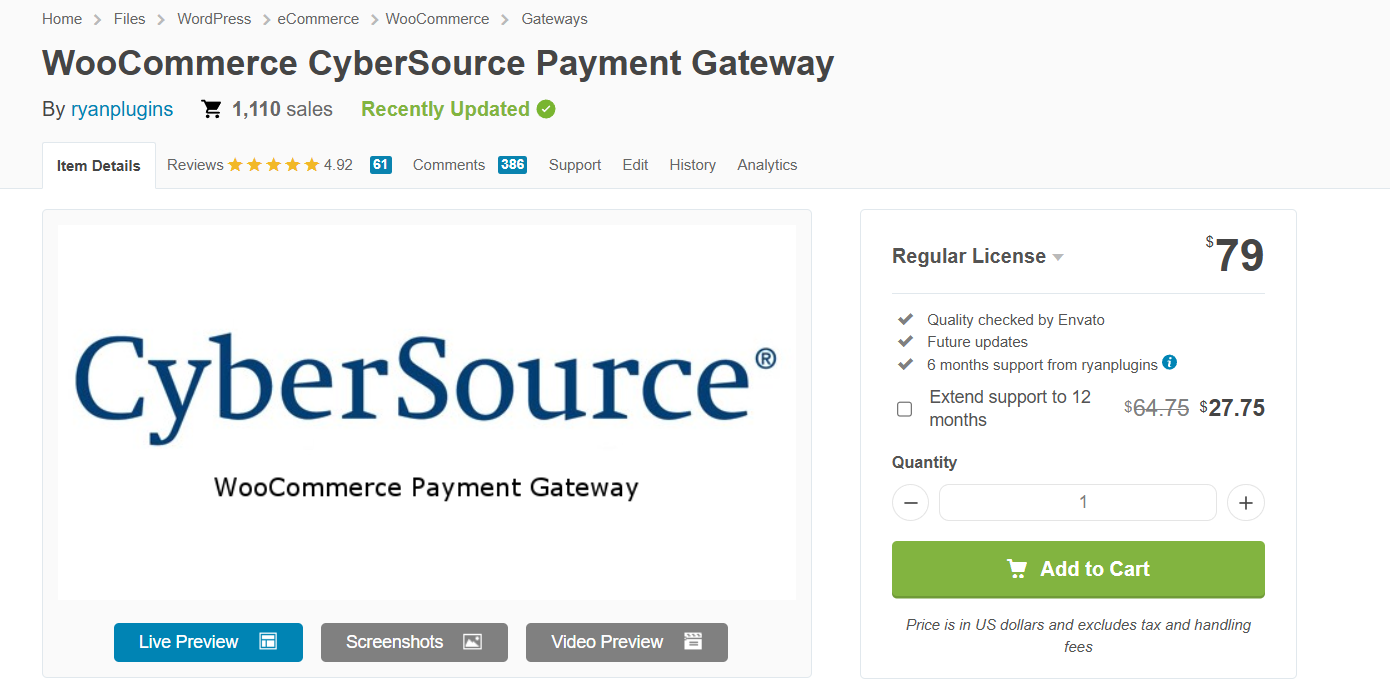
Step 14. Download and install the plugin
Download the latest version of the WooCommerce Cybersource Payment Gateway plugin (version 2.5.x or later) and install it on your WordPress site.
codecanyon.net/item/woocommerce-cybersource-payment-gateway/12199526
Step 15. Activate the plugin and enter your license
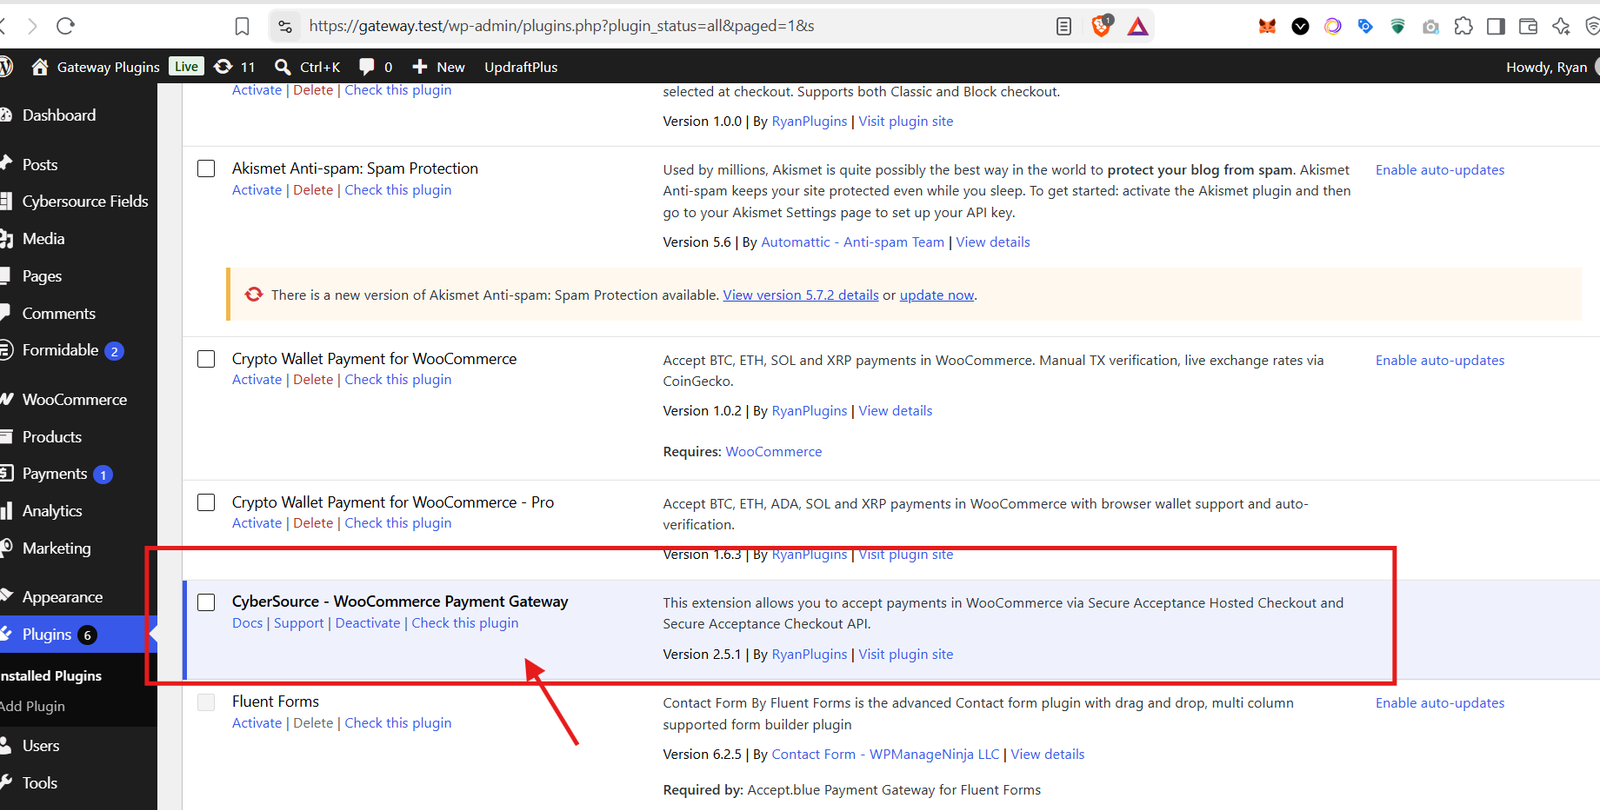
Step 16. Activate your license key
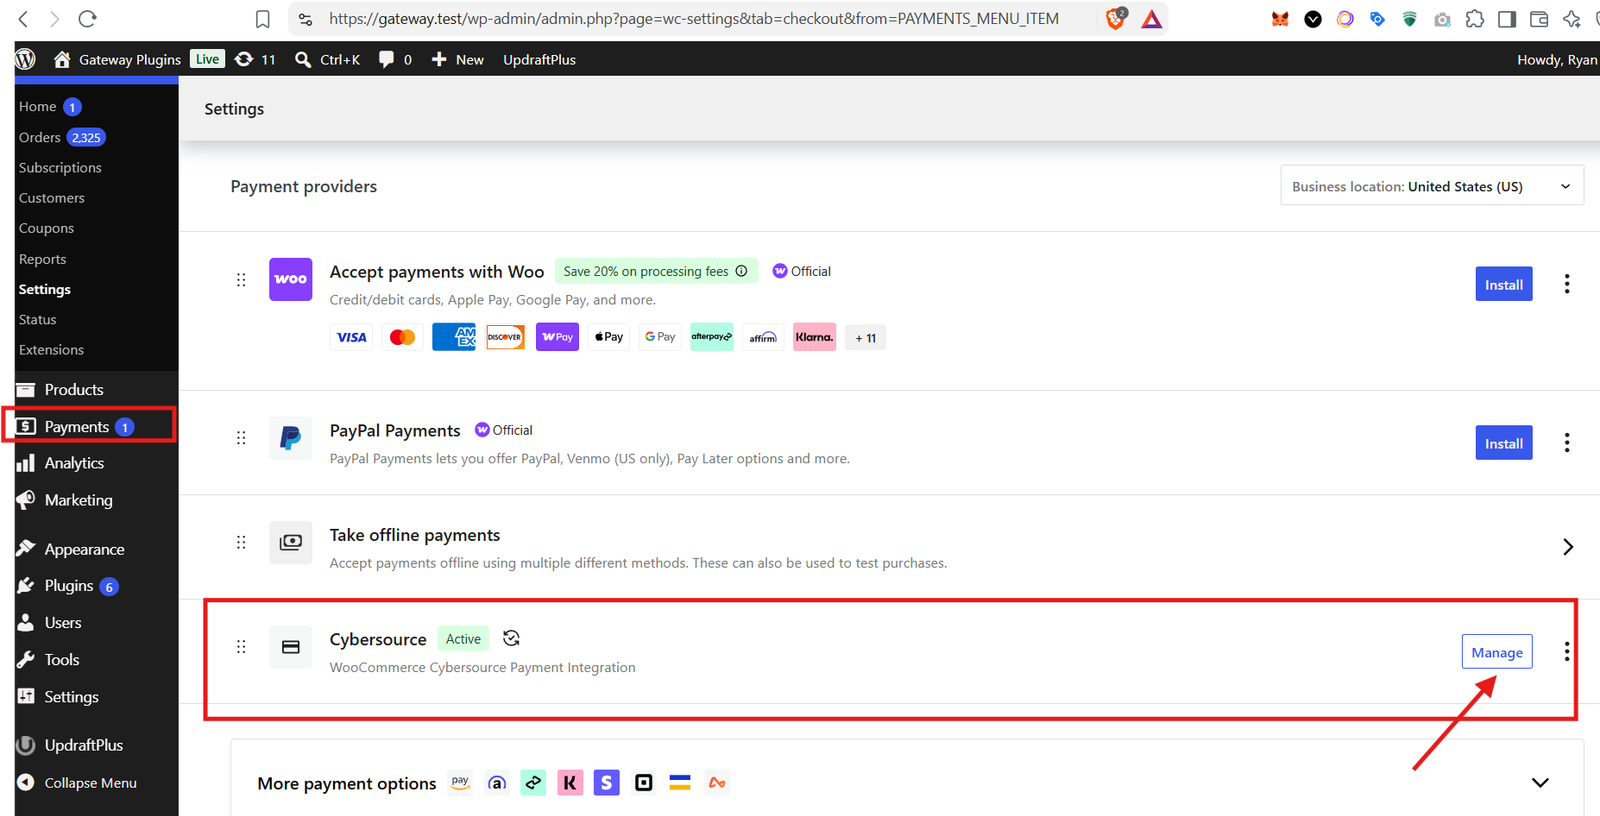
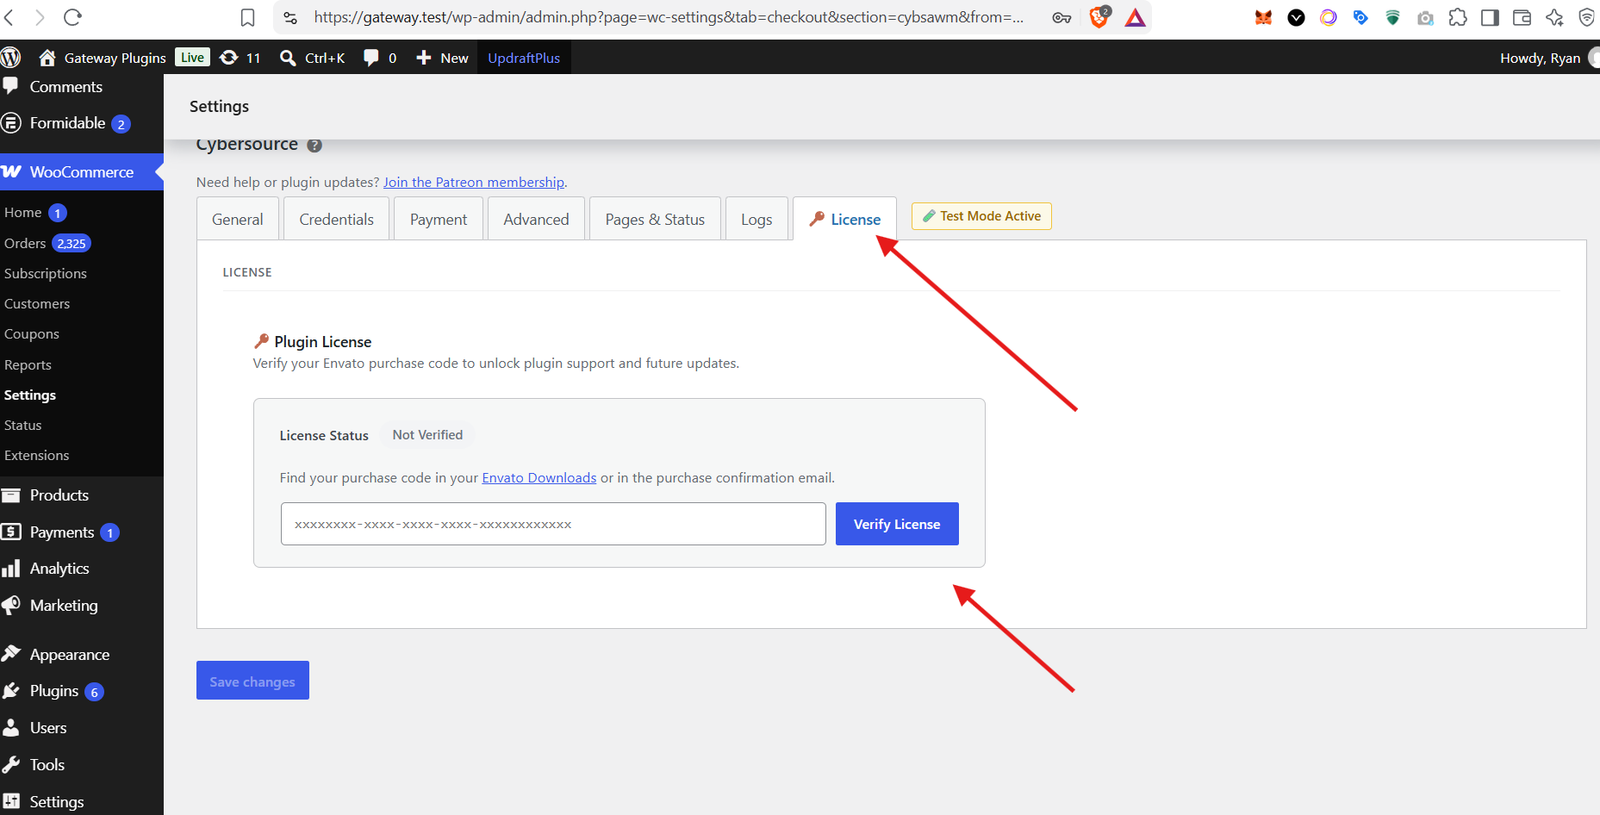
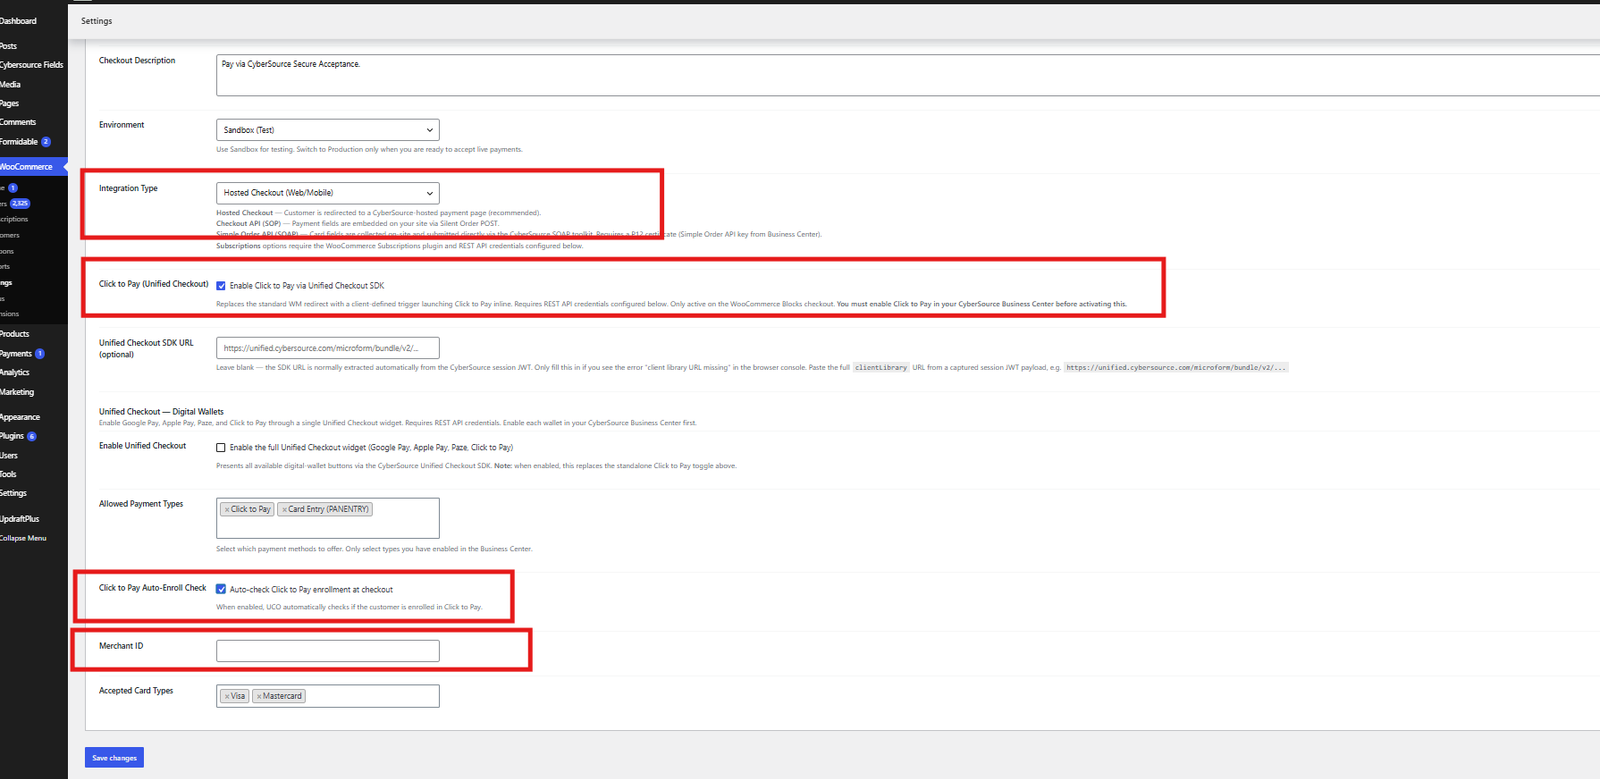
Section 7 — Turn On Click to Pay
Click to Pay lets returning customers check out faster using a saved card profile through the Unified Checkout SDK.
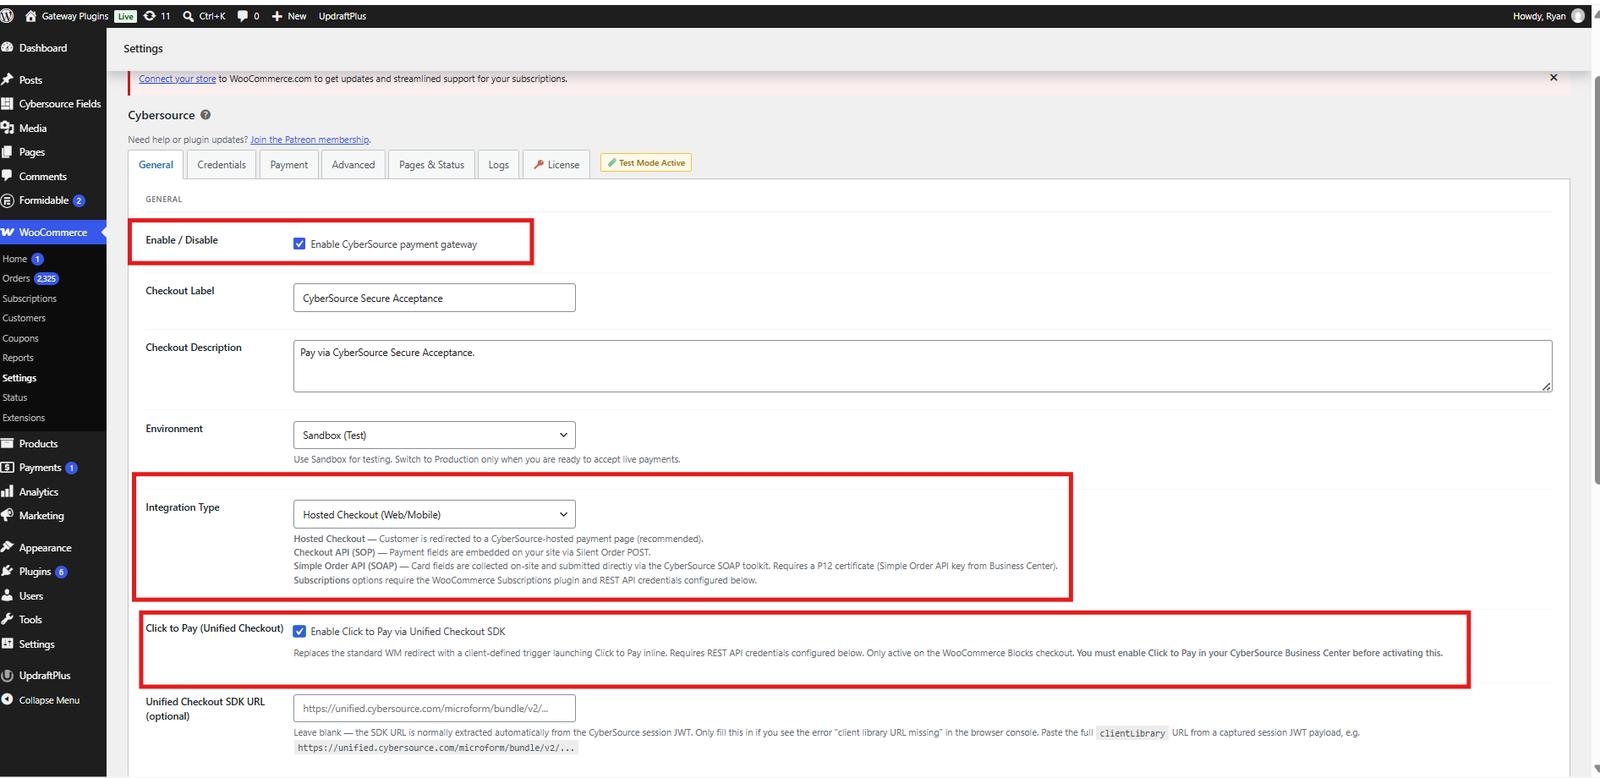
Step 17. Configure Click to Pay settings
Set the following options:
- Integration Type = Hosted Checkout
- Click to Pay (Unified Checkout) = Enabled
- Click to Pay Auto-Enroll Check = Enabled
- Merchant ID = your Cybersource merchant ID
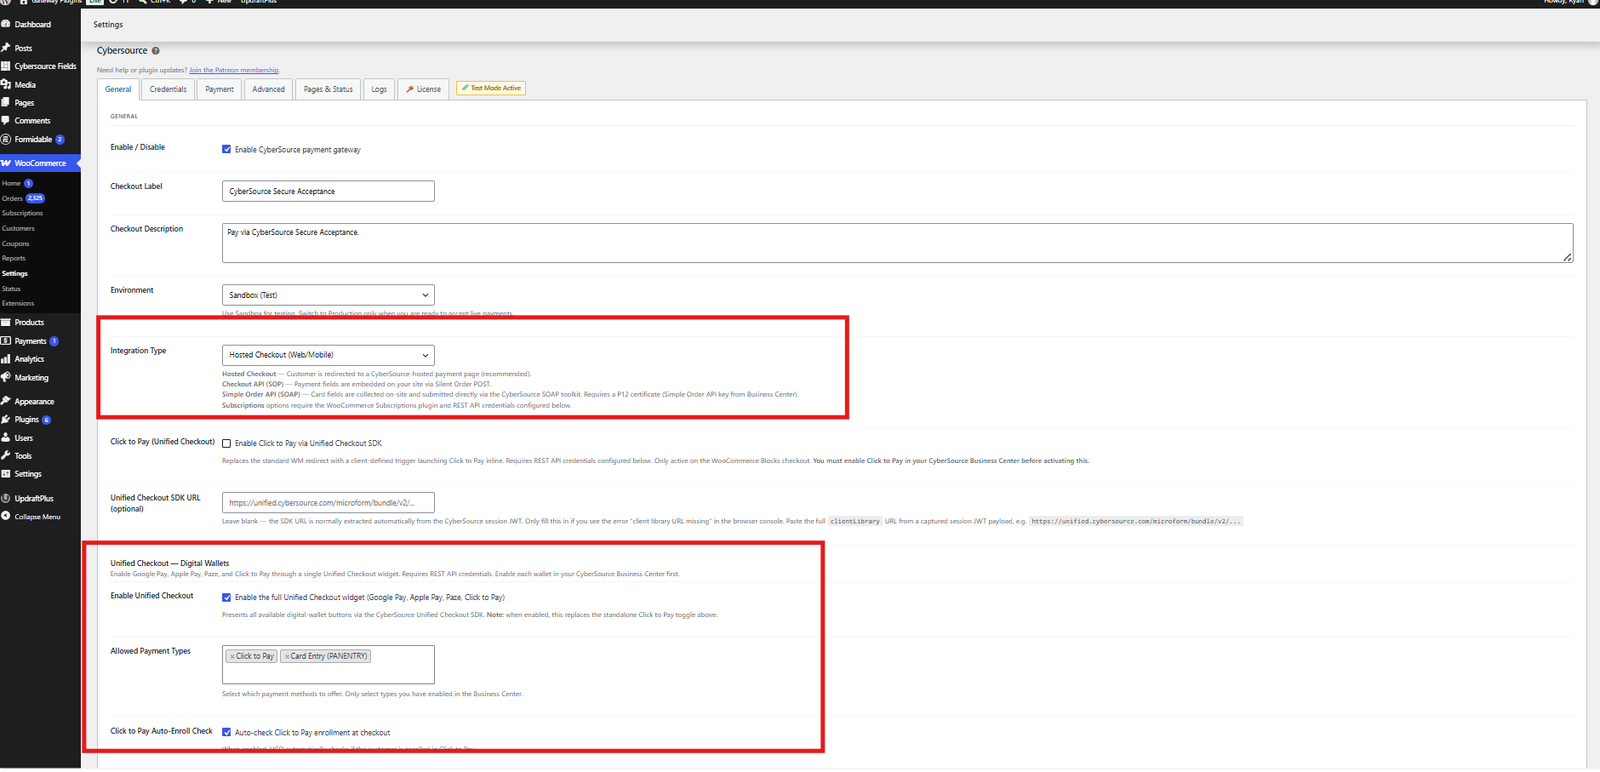
Section 8 — Turn On Unified Checkout for Card Payments
This enables the standard Unified Checkout card form (digital wallets are limited to cards in this configuration).
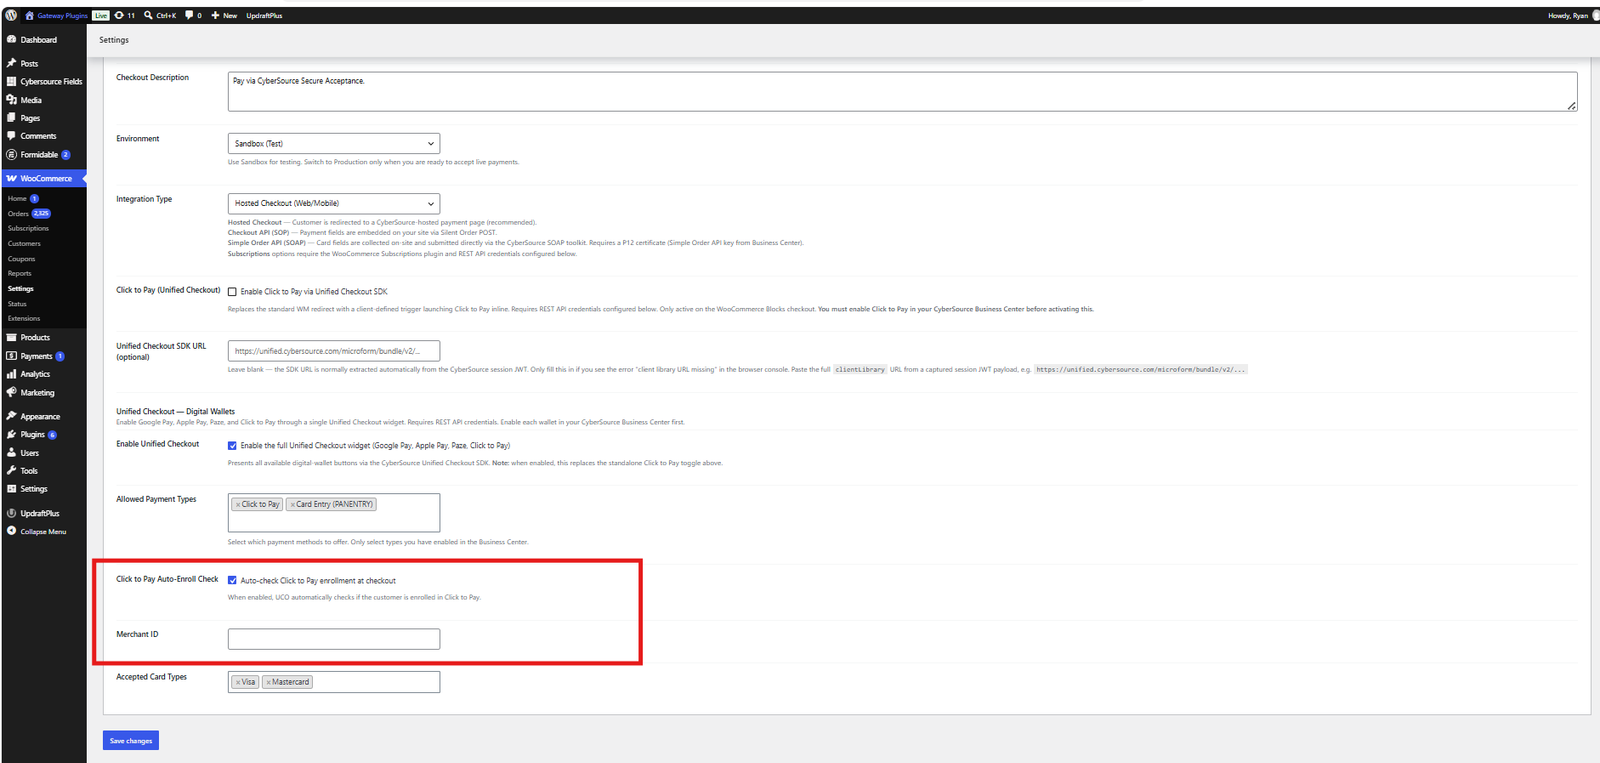
Step 18. Configure Unified Checkout settings
Set the following options:
- Integration Type = Hosted Checkout
- Enable Unified Checkout = Enabled
- Click to Pay Auto-Enroll Check = Enabled
- Merchant ID = your Cybersource merchant ID
Section 9 — Connect Your API Credentials
This step links the certificate you generated in Section 5 to your WooCommerce store, using P12 / JWT authentication.
Step 19. Enter your credentials in WooCommerce
Menu path: WooCommerce › Payments › Cybersource › Manage › Credentials
Set the following options:
- REST Auth Mode = P12 Certificate (JWT — recommended)
- REST P12 Certificate File = upload the certificate file you downloaded in Section 5
- REST P12 Passphrase = the password you created when downloading the certificate
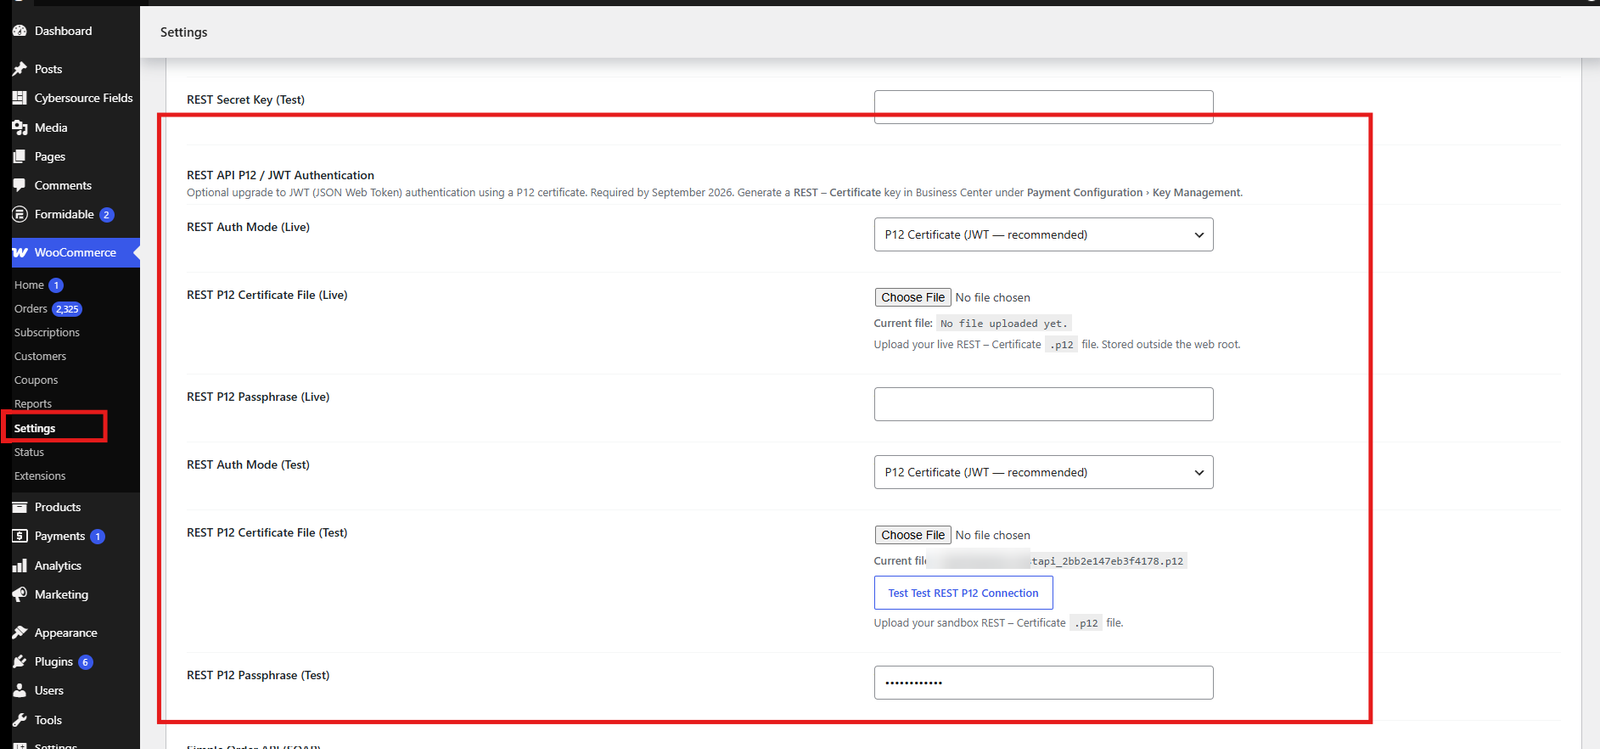
Click Save Settings to finish.
Section 10 — Preview the Checkout Experience
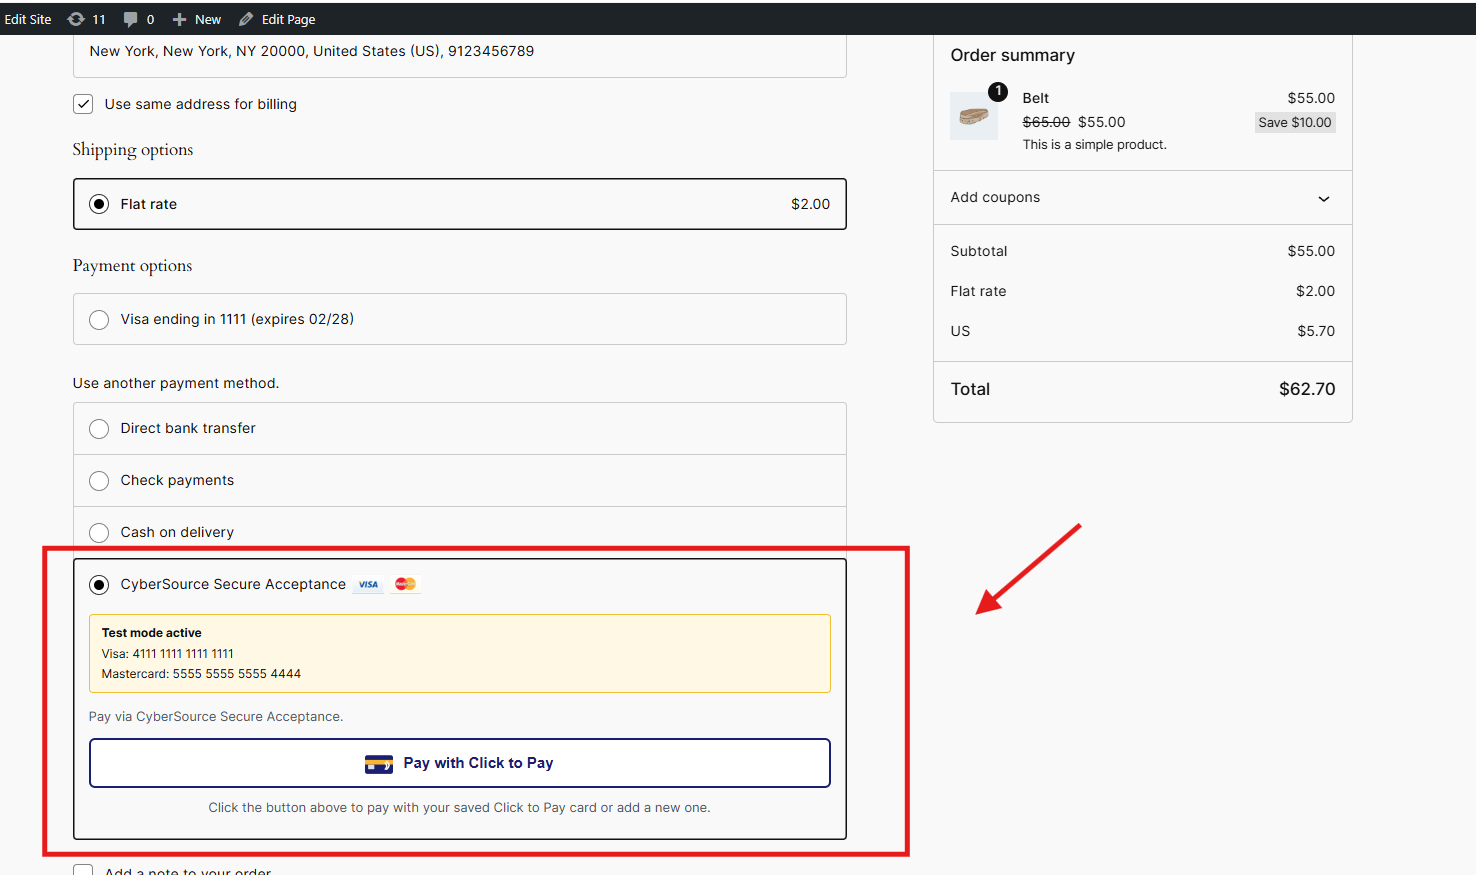
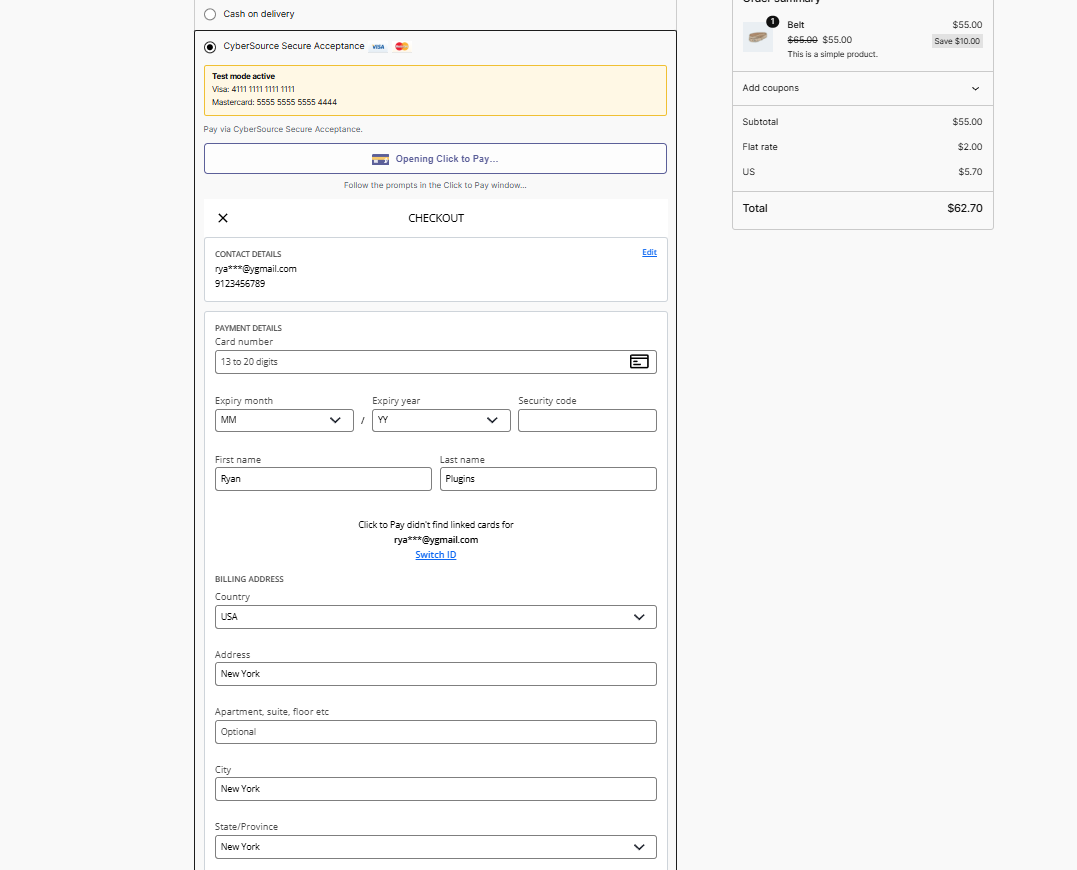
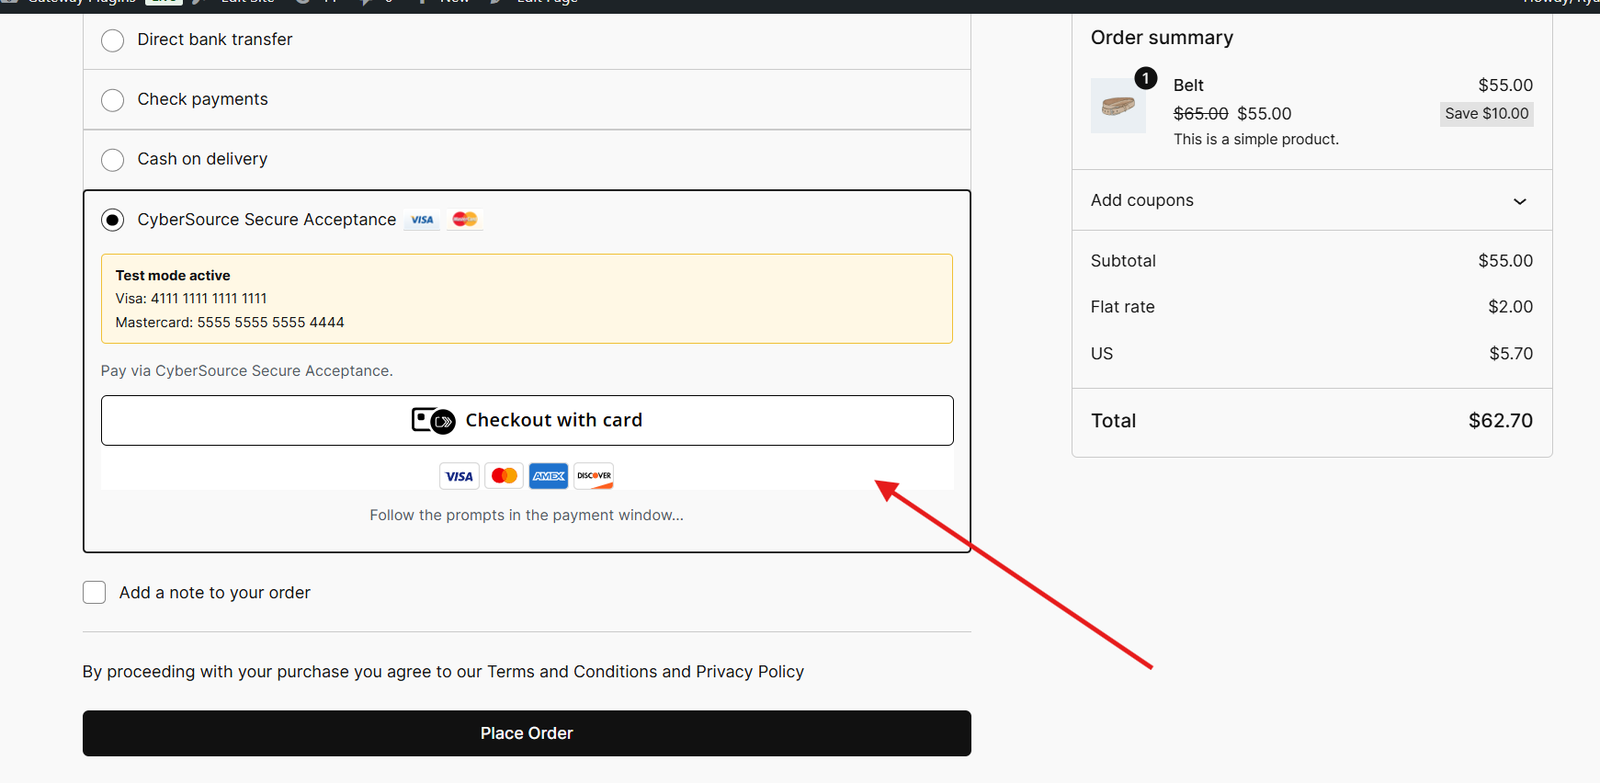
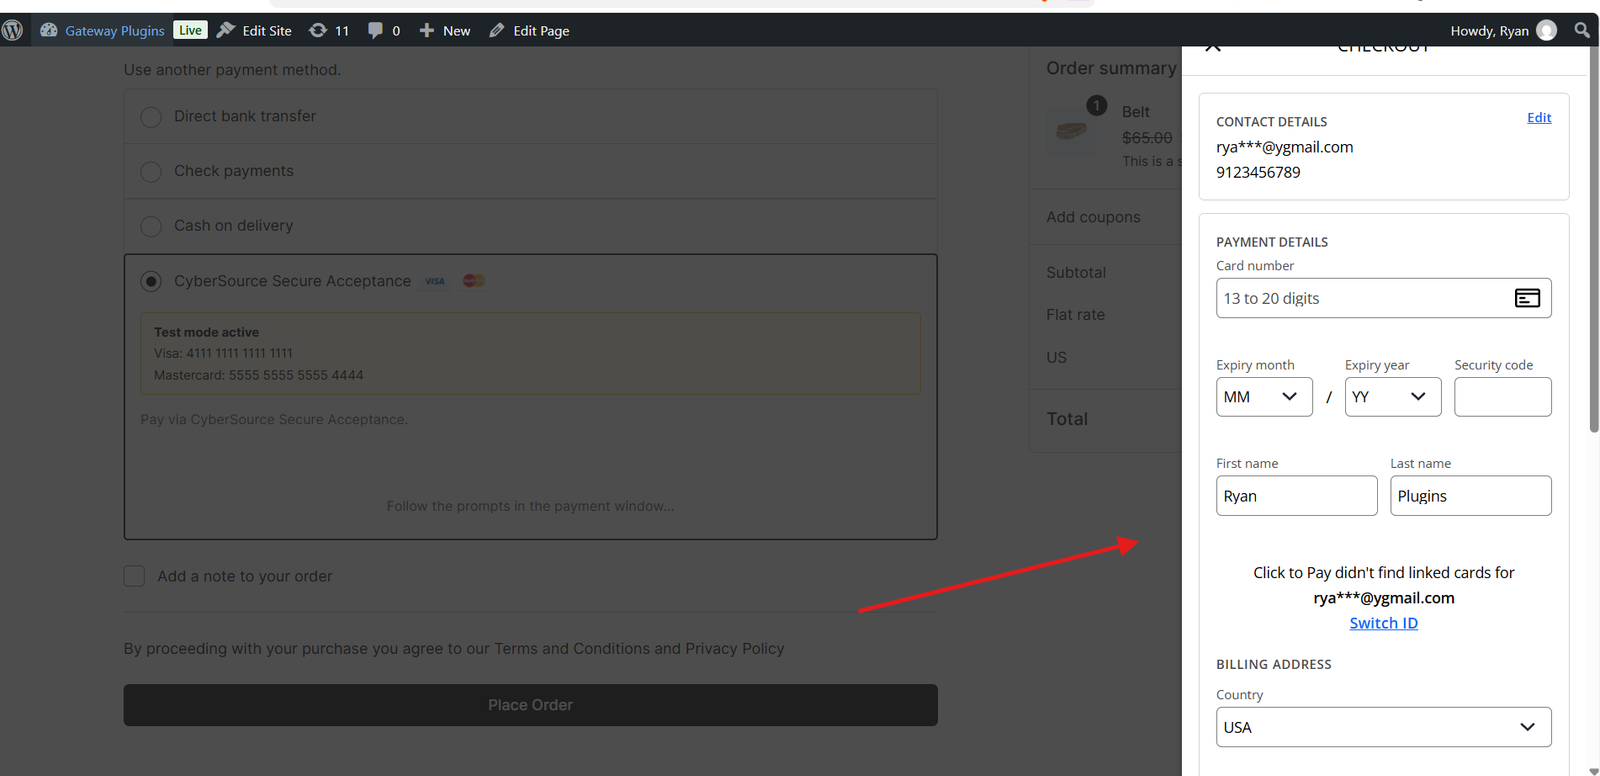
Here’s what your customers will see once everything is set up.
Click to Pay via Unified Checkout SDK
Unified Checkout (Cards Only)
Need Help?
- Plugin Page: codecanyon.net/item/woocommerce-cybersource-payment-gateway/12199526
- Support: support@ryanplugins.net
- Premium Support: patreon.com/RyanPlugins
- Security Policy: ryanplugins.net/security-policy
- Plugin Author: ryanplugins.net